Sunday Inspiration: The Hills

See that steep road in the center of the picture above.  This is the view off my back deck and that’s the hill I ride my bike up a couple of times a week!  Honestly, it’s steeper in person.  Something about the camera that flattens things and distorts it a bit.

I’m a Florida girl who has lived in Texas.  Bottom line – I’ve never learned how to negotiate hills on my bike or use my gears.  So this is what I’m learning, and that hill above is my ‘bunny slope’.  I actually climb that hill at least three times while I’m out riding….

Because this is what I have to do next!!!

And that’s just to get out of my neighborhood!

I started doing a cycling class three times a week at the beginning of the summer.  It’s hard work and the first week I got sick and almost passed out but now that I do it regularly I really enjoy the class.  And that’s when I got motivated to replace my bike and ride.

So when I’m in spin class, I visualize this hill, and I visualize climbing up the hill, and I crank up the resistance.  And one day soon I’ll make it up the hill!!!

And I’ll ask you to celebrate with me!!

What ‘hills’ are you climbing?

Tell us your story…

and let us celebrate with you when you reach the top of your hill!

Enjoy! Julie

Thoughts & Prayers get well soon card

Speedy Recovery Card

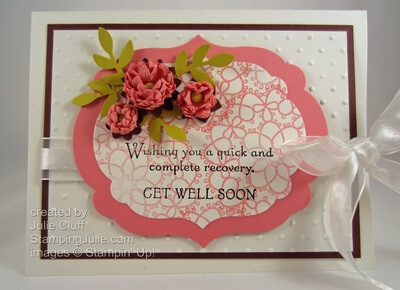
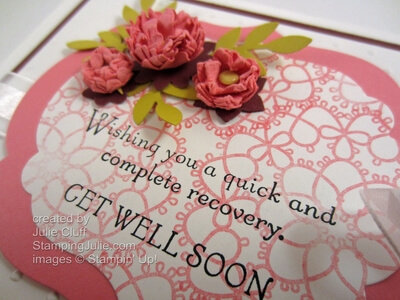
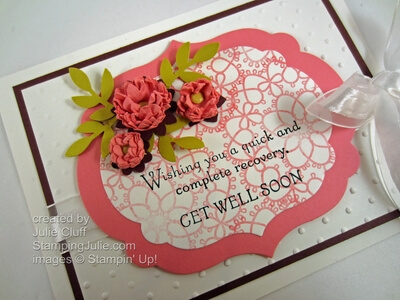
Thoughts & Prayers get well soon card A friend had out-patient shoulder surgery this week.  She has been in pain for quite a while, so she was excited to have this surgery in hopes of some relief.  I made this card to cheer her up and give her something pretty to look at while she is resting.

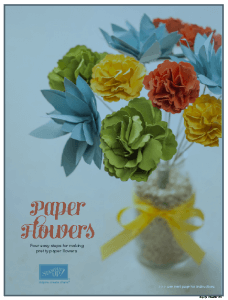
The flowers on this card are made with the flowers punched out with the Boho Blossoms Punch and the technique described in this tutorial below.

paper flowers how to

 Paper Flowers Tutorial PDF

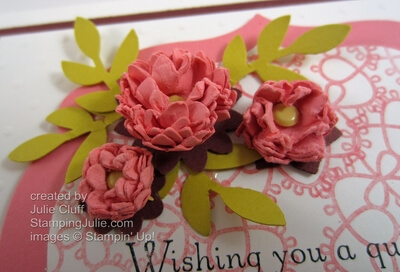
I punched five each of the different-sized blossoms from Regal Rose card stock, spritzed them with water, and layered them to create the three flowers.  I then adhered each to a matching Bravo Burgandy blossom base.

Thoughts & Prayers get well paper flowers

 The leaves were punched out of Summer Starfruit card stock with the Bird Builder Punch, the stems trimmed and  glued behind the flower base.

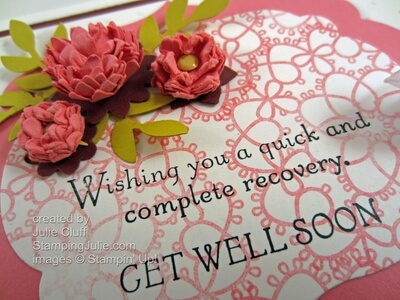
Thoughts & Prayers get well label

To create the greeting label, I started with a Whisper White card stock, and repeatedly stamped the doily  from the Delicate Doilies stamp set with Regal Rose ink stamped off once for a lighter application.  The greeting is from the Thoughts & Prayers stamp set stamped with a StazOn ink pad.

Thoughts & Prayers get well framelit

After I did all my stamping, I positioned the Labels Collection Framelit to surround the greeting, ‘taped’ it down with post-it notes to keep it in place, and ran it through my Big Shot Die-Cutting Machine.  I also die cut a second label out of Regal Rose card stock of the larger-sized framelit for layering.

Thoughts & Prayers get well card polka dot background

To finish the card I embossed Whisper White card stock with the Perfect Polka Dot embossing folder, layered on Bravo Burgandy card stock, added ribbon and assembled the card.

This card reminds me of my friend’s gentle southern charm!  I hope she likes it.

Enjoy!  Julie

Shop 24/7 in My Online Store!

Card Recipe:
Stamps: Thoughts & Prayers w-#113252 c-#127805, Delicate Doilies w-#122590 c-#122592
Ink: Regal Rose #126947, Black Stazon #101406
Paper: Whisper White #100730, Regal Rose #105130, Bravo Burgundy #105123, Summer Starfruit #126839
Extras: Big Shot #113439, Labels Collection Framelits #125598, Boho Blossoms Punch #119858, Perfect Polka Dots Folder #117355, Organza Ribbon #114319, Brights Brads #119740, Little Leaves Sizzlits #114511


Don’t Make These Mistakes!

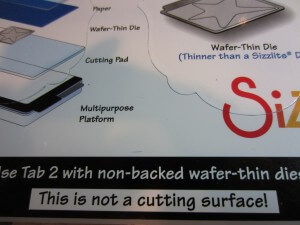
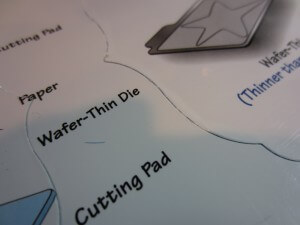
big shot platform warning Mistake #1 – See that warning.  “This is not a cutting surface!”  Now see the shapes cut into the surface!  Well, this is why I don’t recommend stamping late at night!!  The really stupid part is I did it twice.  So when your cutting with framelits make sure you sandwich it between your cutting plates.

big shot platform mistake

The good news is it’s still usable, just messy looking now.

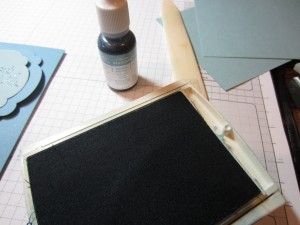
Mistake #2 – I reinked my Baha Breeze stamp pad  with the Marina Mist reinker!  I thought I had the Marina Mist stamp pad out, but I didn’t.  I’ve never done that before.

Now, occasionally someone at a stamp camp will accidentally tap a stamp that was previously inked with dark ink on a light stamp pad.  The best way to clean up the stamp pad is to wipe it with paper towels and then reink the pad.  So that’s what I did  with my Baja Breeze stamp pad.  I soaked up as much of the Marina Mist ink as I could with paper towels and then reinked the pad with Baja Breeze reinker.

Reinking a stamp pad

It’s always a good idea to buy the reinker with your stamp pad.  You never have to worry about having enough ink on your stamp pad and they are great for watercoloring and lots of other techniques.

Enjoy, Julie

sweet essentials ribbon flower birthday card angle

Cotton Ribbon Flower Birthday Card

sweet essentials ribbon flower birthday card angle

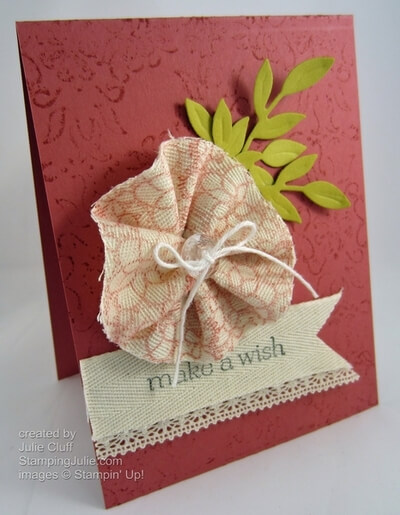
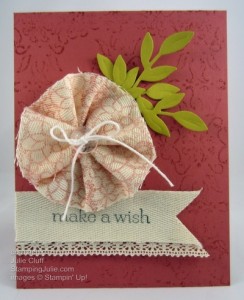
The Stampin’ Up! exclusive magazine for demonstrators is a wonderful source of inspiration.  This past month it featured an article on stamping on ribbon using the new 7/8” Cotton Ribbon and the Border Banter stamp set, both on page 20 of the new Holiday Catalog.  In the catalog you’ll see a candy box tied with the festive green stamped ribbon.  Very playful and lovely!

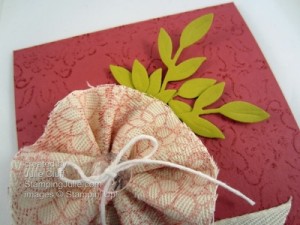
My card uses the same layout and basic features of the stamped card found in the magazine.  To create the ribbon flower, the ribbon is first stamped with Primrose Petals ink and ruffled in the middle and hot glued to a cardstock circle.  Once the base of the flower was complete, I threaded a white twine bow into the clear Vintage Button and adhered that to the flower with glue dots. sweet essentials ribbon flower birthday card close up

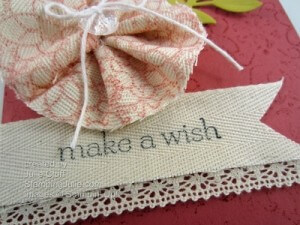
The ‘make a wish’ greeting was also stamped on ribbon; this time using Black StazOn ink.  A strip of Crochet Trim was affixed to the back of the ribbon and then the flag end was trimmed out with Craft Scissors.  The Craft Scissors are wonderful and cut through ribbon and paper like butter! sweet essentials ribbon flower birthday card sentiment

A quick word about Craft Scissors and other tools – I used to think I was no good at baking cookies until I invested in long-lasting quality baking tools, like a baking stone and a cooling rack.  When I started using the quality tools my experience with baking was transformed.  Every batch was successful!  Craft Scissors and other high quality Stampin’ Up! tools are invaluable in transforming your crafting experience into fabulous success!

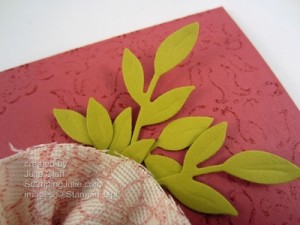
The leaves are Little Leave Sizzlits cut outs.  Using the tip of the Bone Folder, I creased the center of the leaves for a more natural look.  sweet essentials ribbon flower birthday card leaves

And finally, probably my favorite part of this card, the background!  This background was featured in video #1 in the recent article 5 new Stampin’ Up! How-To Videos !    Starting with the Vintage Wallpaper Embossing Folder, I used a brayer to roll ink on one side of the open folder.  Then I sandwiched the cardstock in the folder and gently rubbed the inked folder over the Primrose Petals paper.  That’s it.  Instead of embossing the card front I just used the folder to ‘stamp’ the paper creating this lovely background!  Watch the video if you’re still trying to figure out what I did!

Try the new ‘stamping with an embossing folder’ technique. Order your cotton ribbon today and start stamping!

Enjoy!  Julie

Shop 24/7 in My Online Store!

sweet essentials ribbon flower birthday card Card Recipe:
Stamps: Sweet Essentials w-#126455 c-#126457, Delicate Doilies w-#122590 c-#122592
Ink: Primrose Petals #126858, Black Stazon #101406
Cardstock:  Primrose Petals #126841, Summer Starfruit #126839
Extras: Vintage Faceted Designer Buttons #127555, Natural Cotton Ribbon #127844, Crochet Trim 118481, White Baker’s Twine #124262, Little Leaves Sizzlits #114511, Brayer #102395, Craft Scissors 108360, Vintage Wallpaper Folder #120175

Join the Fun!

Have you ever thought about owning your own business?

Do you just want access to a lot of fabulous product and great ideas!?

Have you thought about doing what I do?


By the way, when you join during the month of August, you’ll receive this great Spooktacular Halloween Project Kit!

spooktacular halloween project kit

Would you like to know more about becoming a Stampin’ Up! Demonstrator?

When you join our group of stampers and/or digital designers as a Stampin’ Up! demonstrator, you start your own rewarding venture!

Could this be your next step in the development of your creativity?

And the benefits are many:

  • Flexible schedule – work around your home and family life…set your own schedule…work the hours you want to work!
  • Income – you decide how much you want to make…work a little for extra income for Christmas or a special vacation…or work more for more income, bonuses and incentive trips to improve your lifestyle!
  • Support – from me and from Stampin’ Up!…we’ll help you accomplish YOUR goals!
  • Creativity – enjoy what you love, and, if you choose, make money sharing high-quality papercrafting and digital products...plus enjoy a discount on the products you love!

Whether you want a business or just to enjoy your hobby – join us . All you need to get started is to purchase your $99 starter kit worth $190. For more information Click Here. Call or write to me today and you’ll recieve more information by mail with absolutely no obligation!

Invest in your future today!

It would be so fun to have you join me in this adventure!!!

Enjoy!  Julie