Tagged: card making techniques

oct stamp camp

Stamping Julie Live and Virtual Events

oct stamp camp Are you excited about the holidays?  Are you wanting new creative ideas and how-to’s to make your holidays extra special for you and your family?  Your friends and family will drool over your handmade creations.  You’ll feel special and so will they! 

Do you live near Louisville, KY?  Then join me for my October 25th Stamp Camp.  Details below.  And view more events by clicking the Events tab above.

If you don’t live close or can’t make it on the 25th, don’t despair!  You can still get all the creative ideas and how-to’s!  Join me for a virtual stamp camp delivered directly TO YOU on October 20th .  Enjoy 30 minutes of exclusive video tutorials with lifetime access, which include step-by-step instructions to make all three projects PLUS additional project ideas, AND a PDF file with full color pictures and step-by-step directions  with complete cutting measurements.

Two ways to get the virtual stamp camp

Option 1 – In the US Only! Purchase $35 or more in Stampin’ Up! product from my store by October 20th and receive the videos and PDF file as a FREE bonus.  Place your order and then click here  or leave a comment below with your email address to claim your FREE bonus!

Option 2 – Available to ALL! Order video demonstrations and PDF file for only $8.  This is great for everyone looking for creative inspiration, including stamping demonstrators who need ideas for their own events!  Click ‘Buy Now’ button and order now.


WHAT OTHERS ARE SAYING ABOUT STAMPING JULIE VIRTUAL EVENTS:

“So cute, and great tutorial! Thanks so much for sharing!” – Kat R.

“Julie has always been a great inspiration, especially when it comes to card design.  Very helpful in teaching different techinques.” – Debbie M.

“I am fairly new to Stampin’ Up!, and your cards and ideas help me in my demonstrations.  So, thank you so much for your help.” – Cindy H.

oct stamp camp

Girls Night Out Stamp Camp

Thursday, Oct. 25, 2012 7:00 pm

Rubber stamping with Julie Cluff
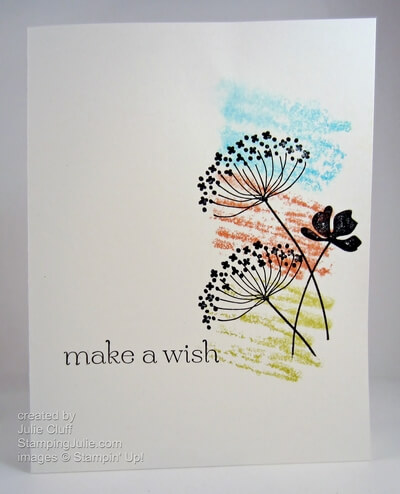
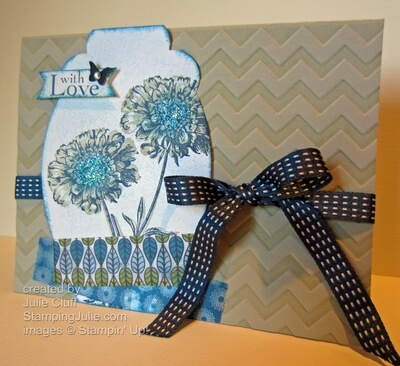
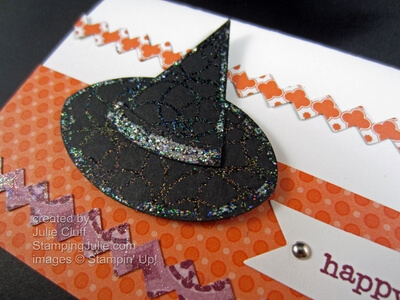
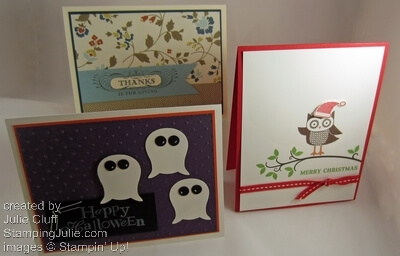
Make 3 projects!

$10 class fee or FREE with product purchase that night

Door prizes & light refreshments!

Sign Up Now:

(Limited to 10 stampers, so make your reservation early)

Questions? or Need directions:  Email me or call number above

Most people enjoy bringing their own class kit.**

**Class Kit: Paper Trimmer, Scissors, Adhesive, bone folder or scoring blade. (if you don’t have some of these supplies, no problem, there will be some available for sharing.)

WHAT OTHERS ARE SAYING ABOUT STAMPING JULIE EVENTS:

“YIPPEE! Thanks for hosting another great camp!” – Karen W.

“I have to admit I was a bit intimidated by the prospect of making those beautiful cards, but I had so much fun!” – Cathy P.

“Mary and I had a great time last nite and we look forward to the next stamp camp.” – Vicki R.

Stampin' Up! summer silhouettes congratulations card angle

Getting Started: Card Making – The Basics

Stampin' Up! summer silhouettes congratulations card angle No one is born knowing how to make their own cards.  It’s true!!  I remember when I was first introduced to the idea of rubber stamping and card making.  I would ask how to do it and the answer I would get would be something like this:  Cut your paper in half and fold it.

That sounds simple enough, but is that all there is to it? I would always be left with all these unanswered questions: Cut the paper where? How do I design it?  How do I layer? How do I mail it when I’m done?!?

Do these questions sound familiar to you?

Here are some basics to unleash your inner creative diva and impress your friends and family while making them feel special too!

 The dimensions of a standard homemade greeting card are 4-1/4″ x 5-1/2″ and it fits in an invitation-size envelope.  Stampin’ Up! offers beautiful envelopes  and they are easy to stamp on too!

To create the standard greeting card, cut your 8-1/2″ x 11″ cardstock on the 11″ side at 5-1/2″, then fold it in half.  Half of 8-1/2″ is 4-1/4″ so that will give you a card measuring 4-1/4″ x 5-1/2″.  There are variations on greeting card sizes and cuts but this is the best place to start.

Now start adding.  Here are some ideas.

1. Leave the background clean or stamp a random pattern all over the background similar to what you see in the card below.  (Make sure you stamp off the edges for a natural look.)

2. Stamp your focal point image, cut it out square and layer it by adding cardstock behind it that is slightly bigger.  Add 1/8″, 1/4″ or 1/2″ to the size of the square depending on the size frame you want.  For example, if you want a narrow border and your piece is 2″ x 2″, cut your layer 2-1/8″ x 2-1/8″.

3. Use punches for quick, layered elements. Like this circle inside the scallop circle.  Punches are great for layering and you will see me use them a ton. Betsy's Blossoms sunny birthday card angle

4. Add a greeting by stamping on a separate scrap of cardstock, cutting it out and adhering it, OR by stamping directly on the background cardstock.   On the card above the greeting was added as a banner.  On the card below the sentiment was stamped directly on the background.

5. Use a good adhesive.  I highly recommend SNAIL adhesive.   Add enough adhesive to keep your card together but do not cover the entire surface!  Usually 1/2″ to 1″ (depending on the size of your piece) in each corner is sufficient.  I used inadequate glue one time for my son’s birthday invitations and they fell apart – yikes!  owl occasions birthday wish angle

6. Keep it simple and fun, and your design work will keep expanding.   My first cards were simply folded cardstock with a greeting stamped in the middle.  Seriously!  I’m not kidding.  When my son was born I grabbed some cardstock, quickly cut it, folded it,  stamped a thank you message on the front and that’s what I sent as a thank you card.

This owl card looks involved and complicated, but it really is just starting with the basics –  folded cardstock – and adding layers and embellishments.  Experiment and  most of all have fun!!!

Click Here to Order your Stampin’ Supplies

 Click Here for Fun, Easy Digital Scrapbooking! 

 Enjoy!  Julie

summer silhouette cas birthday

Watercolor Block Stamping

summer silhouette cas birthday

A single layer birthday card with no embellishments, unless you count glitter.  🙂  I’ve been wanting to try the watercolor block technique.  This entails coloring on an acrylic block and stamping with the block.  It’s a little trickier than I originally thought and it took me a few tries to get an effect I liked.

I used the Summer Starfruit, Tangerine Tango and Tempting Turquoise markers to scribble freely on an acrylic block.  Then I lightly spritzed the block with water before stamping on the Whisper White card stock.  It’s very important to spritz it lightly.  I sprayed it from about a foot away and only once.  Anymore water than that makes it too wet and the colors run and get messy.

summer silhouette cas birthday detail

I stamped the Summer Silhouette images over the color blocks with Black StazOn ink.  When I stamped the lower images, I masked the bottom so the stems would not extend below the color blocks.

Using a two-way glue pen I tapped a little glue on the flower blooms to add Dazzling Diamonds Glitter.  Can you see the glitter in the picture below?  Glitter is so hard to photograph.  🙁

summer silhouette cas birthday glitter Announcing a Merry Christmas from Stampin’ Up!  Recieve FREE product with purchase in time to create your Christmas ornaments and cards!

Christmas stamp bundle sale

Here’s two Christmas special offers during October!

  • When you purchase the Ornament Keepsake stamp set & the Candlelight Christmas designer paper, you’ll receive the Festive Paper piercing pack for FREE!

Stampin' Up! Ornament Keepsakes promotion

FREE Festive paper piercing pack

  • Or when you purchase the Ornament Keepsake Bundle with the Candlelight Designer paper you’ll receive the Festive Paper piercing pack for FREE


Stampin' Up! Ornament Keepsakes Bundle promotion

FREE Festive paper piercing pack

 Click here to order your Christmas special.

Enjoy!  Julie

summer silhouette cas birthday close up

Card recipe:
Stamps:  Sweet Essential w-#126455 c-#126457, Summer Silhouettes w-#126445 c-#126447
Ink: Black StazOn Stamp Pad #101406
Extras: Two-Way Glue Pen #100425, Dazzling Diamonds Glitter #102023, In Color Markers #126856,  Brights Markers #119702
 
field flower love card angle

Stampin’ Up! Field Flower Love

field flower love card angle “Navy Pacific Sand” – the Splitcoaststampers Color Challenge!  I used a few interesting techniques on this Field Flowers love card including brayering the embossing folder and creating faux washi tape.

I started by stamping the stems in Sahara Sand, then in Night of Navy which creates a bit of shadow.  The flower outlines were then stamped in Night of Navy with Sahara Sand shading.  I then cut this with the largest framelit from the Apothecary Accents framelits set.

I used Pacific Point to sponge the interior of the flower and the edges of the panel, then a lighter sponge throughout.  Then I used Dazzling Details to add some heavy glitter to the center of the flowers.

field flower love card detail

Before embossing the Sahara Sand card front, I brayered Sahara Sand on the embossing folder so when I ran it through the Big Shot it creates a contrasting shadow.  The Apothecary flower panel was attached to the card front.

The faux washi tape was created with scotch tape and International Bazaar Designer Series Paper.  This is a technique I learned at the Stampin’ Up! Chattanooga Regional event.  I taped a section of pattern paper then ‘washed off’ the back of the pattern paper until it appears clear.

field flower love card washi tape

The Stitched Satin Midnight Muse Ribbon is on special this month and is free with a $40 order.  This ribbon is so great feeling and so easy to work with!  You’ll love it!  This ribbon is available in all the latest In Colors.

Order your Satin Ribbon FREE this month with a $40 product purchase.

Order Stampin’ Up! Products Here 24/7

View the Stampin’ Up! Holiday Catalog here

Like us on Facebook

Follow on Twitter

Enjoy! Julie

field flower love card

Card Recipe: 
Stamps: Field Flowers w-#122760 c-#122762
Ink: Night of Navy #126970, Pacific Point #126951, Sahara Sand #126976
Paper: Whisper White #100730, Sahara Sand #121043, International Bazaar Designer Series Paper #126920
Extras: Big Shot Die-Cutting Machine #113439, Beautiful Wings Embosslit #118138, Apothecary Accents Framelits #127003, Chevron Embossing Folder #127749, Brayer #102395, Rhinestone Basic Jewels #119246, Dazzling Details #124117, Stampin’ Sponges #101610, Midnight Muse Stitched Satin Ribbon #126847
Teeny Tiny Wishes happy halloween witch hat card detail

Punch Art Witch Hat Video Tutorial

Teeny Tiny Wishes happy halloween witch hat card detail

View the video for step-by-step instructions on creating the sparkly punch art witch hat to decorate Halloween cards and other goodies!  Click here to view the original post with supply list for this card.


Can’t see the video?  See it here or here http://youtu.be/JdclBXxciqY

RIBBON SPECIAL! Don’t forget to order during the month of September and receive FREE ribbon (value $8.95) for every $40 in product ordered.

View the Stampin’ Up! Holiday Catalog here

Order Stampin’ Up! Products Here 24/7

Enjoy!  Julie