Family Sunday: Halloween Share

Today I wanted to share a few pictures of my grandkids from Halloween.  I loved getting these pictures.  It’s hard to be so far away and not be there for these fun times, but I’m very grateful to get the pictures and all the fun stories that go along with them.

Here’s Stephanie with her kiddos all dressed up and ready to go!

steph's family

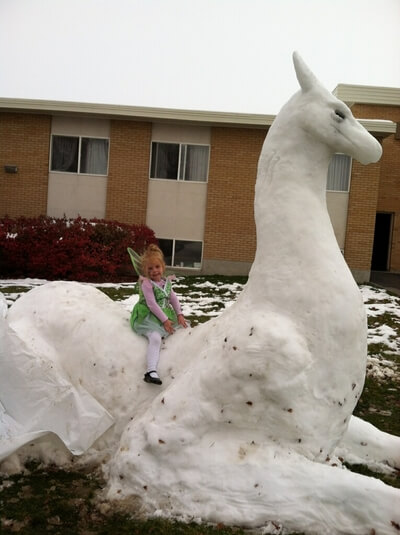
And here’s a picture of 3 yo Savannah on an dragon ice sculpture from a couple days before.  Isn’t that amazing?

sav with ice dragon

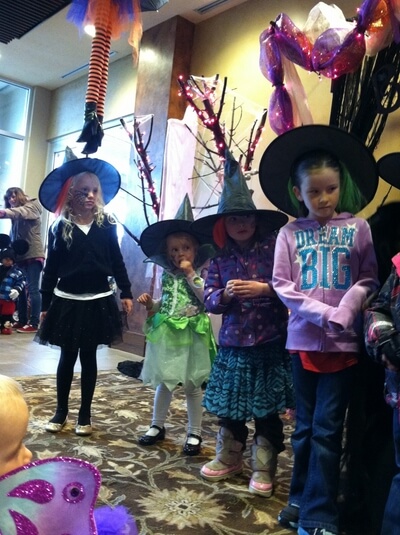
Can you see Savannah in this picture?  She was waiting in the cackling contest line.  She had been looking forward to it for days and practiced on the way there.  So funny!  Mom reports she did great and won a vampire blow toy.  🙂

sav in witch line

Here’s Kristin’s family.  Can you tell what their costume theme was this year?

hunger games theme costumes

  Kristin was Katniss, Joel was Peeta and Siena was Effie Trinket from the Hunger Games.  Here’s the mockingjay pin Kristin made to go on her jacket.

hunger games mockingjay pin

Here’s a couple more pictures of their Hunger Games themed costumes.

katniss & effie trinket costumes

Kristin says that Siena was pretty mad about the lipstick.  🙂

siena as effie trinket

And look at this darling picture of little Siena trick-or-treating.

Kristin writes:  “Halloween = Pure joy for a first time parent.”
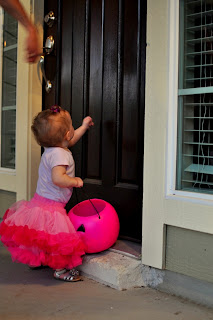
Siena trick-or-treating One daughter lives in Idaho and the other lives in Texas.  I bet you can tell which is which!?  The children are sooo sweet!  And their moms are too I might add!

Enjoy, Julie

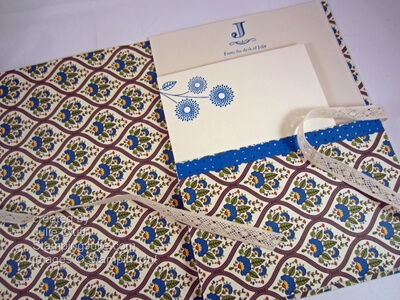
World Treasures stationary kit close up

World Treasures Personalized Stationary

World Treasures stationary kit close up

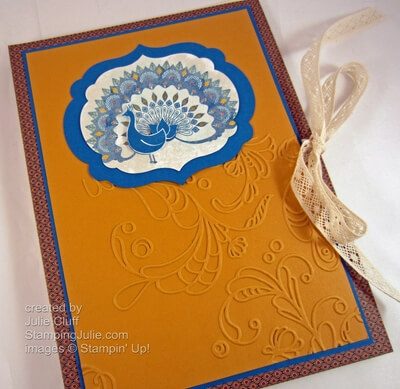
Inspired by the sample on page 147 of the catalog and the birthday gifts my sister made for her friends,  this personalized stationary kit is fabulous.  I chose the International Bazaar Designer Series Paper as a jumping off point.  The paper dictated the colors I used: Pacific Point and More Mustard.  It’s a vibrant palette, don’t you think?

(Scroll to the bottom of the post for the complete supply list linked to the product picture and description.)

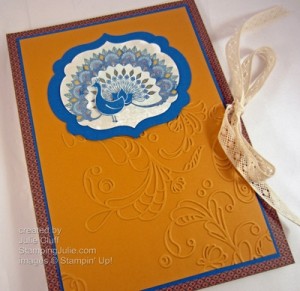
World Treasures stationary kit peacock

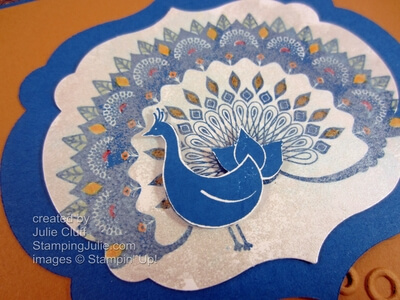
I stamped the peacock from the Stampin’ Up! World Treasures stamp set in Pacific Point and colored in some feathers with my Many Marvelous Markers.  Now here’s the fun part, which is really hard to detect in the photos.  After cropping the peacock out with the Labels Collection Framelit, I covered the stamped and colored label with Shimmer Paint using a sponge daubers.   It gives it such soft, classy sparkle.

I stamped the peacock again, cut out the body and adhered that with Stampin’ Dimensionals.  Then I adhered the peacock lable to a larger label cut from Pacific Point cardstock.  Stampin’ Up!’s coordinating papers and inks makes crafting so satisfying – you always get great results because it matches!

World Treasures stationary kit personalized

The interior has a pocket for holding stationary and envelopes.  I used the Scallop Border Ribbon Punch to finish off the edge of my pocket.  You’ll notice that I didn’t plan ahead correctly and I cut my paper so that my design is sideways.  Don’t make the same mistake I did – double check your design orientation before you cut!  What’s the saying?  “Measure twice, cut once.”  I should have checked twice and then cut.

World Treasures stationary kit

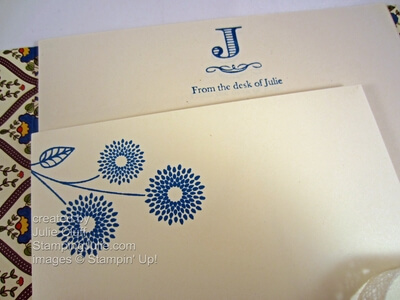
Above is a close up of the stationary.  I used creamy, lightweight paper cut in half  and stamped in Pacific Point with a Monogram Stamp to create the stationary.  The matching envelopes are Very Vanilla envelopes stamped with the flower from the same World Treasures stamp set as the peacock.

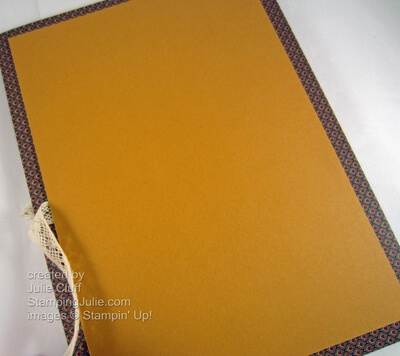
Below is a picture of the back, layered with the matching More Mustard cardstock.  The cardstock layer adds sturdiness and also covers the end of the Victorian Crochet Lace ties.

World Treasures stationary kit back

These stationary sets are great gifts for friends for birthdays or Christmas.  Include a Personalized stamp with the matching stamp pad and it’s a gift they will enjoy for a very long time.

DON’T FORGET TO LEAVE A COMMENTSAY HELLO and let me know what you think.  🙂

Enjoy!  Julie

World Treasures stationary kit close up

Card Recipe:
Stamps: World Treasures w-#126765 c-#126767
Ink: Pacific Point #126951
Paper: International Bazaar Designer Series Paper #126920, More Mustard cardstock #100946, Pacific Point cardstock #111350, Whisper White  cardstock #100730
Extras: Labels Collection Framelits #125598, Elegant Lines Embossing Folder #119277, Big Shot Die-cutting Machine #113439, Victorian Crochet Trim #118481, Frost White Shimmer Paint #116854, Sponge Dauber #102892, Many Marvelous Markers #119806, Dotted Scallop Ribbon Border Punch #119275
 

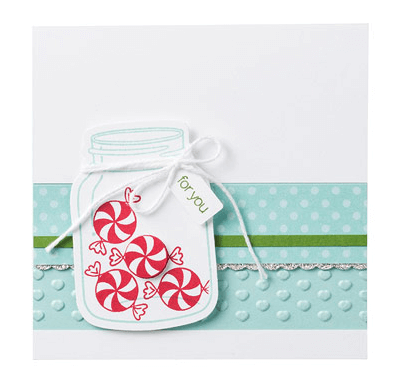
Stampin’ Up! For You Candy Jar Card

Perfectly Preserved For You Candy Jar Card CUTE!!!  Stampin’ Up!’s candy jar gift card created with the Perfectly Preserved and Jolly Bingo Bits stamp sets is darling, bright and cheery.  You can click here to view the complete supply list.   I love the layered Pool Party paper in the background.  The embossed hearts add great texture and the polka dots add wonderful whimsy.  The silver glimmer paper scallop is a brilliant addition.  And did you notice the circle-punched candy popped up with dimensionals?  Best of all, the jar can be quickly cut out with the Big Shot Die-cutting Machine and the coordinating Cannery Set Framelit.  No scissors required.

LAST WEEK TO ORDER THE FINAL VIRTUAL STAMP CAMP FOR 2012. Are you excited about the Holidays?  Me too.  I have prepared a great virtual stamp camp to help you make your holiday season fabulous! Click Here to sign up. (Options for demos too!)

Click Here to Order your Stampin’ Supplies

Click Here for Fun, Easy Digital Scrapbooking 

 Enjoy!  Julie

Anatomy of a Blog Post

I am committed to bringing you quality stamping content on StampingJulie.com.  I love sharing what I love!  Who doesn’t – right?  I enjoy playing in my craft room to create interesting projects and then teaching you what I did so you can have the same fun at your house.  That is my first and primary goal.

My second goal here is to communicate sales and promotions to you so you don’t miss out.  I admit to having nightmares about not doing my job adequately in this area.  I truly don’t want you to miss anything!

But back to the main goal: quality stamping content.  I have quite a process for bringing these projects and blog posts to you and I thought I would give you a glimpse of that process today.

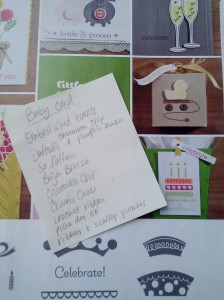
First, I create a project, then I photograph and edit the photo, and then I write my blog post.  It sounds simple enough and once you get the hang of it, it is fairly simple. BUT to do it right, it does take time.  Sometimes there are quite a few days or weeks between these steps.  Yesterday I posted this picture on facebook:

  supply list

The baby card from this past week is a good example.  I made that card over a month ago.  To ensure that I give you accurate information, I take notes when I complete a project.  And the picture above is a copy of my notes from when I made the project.  I keep these notes tucked in my master catalog.

My master catalog is the catalog I use ALL the time.  I check off the stamp sets, ribbons, buttons, brads, etc. that I have in my collection.  I also use sticky notes in this catalog to mark the pages of projects that I want to do or items I would still like to or need to order.

embellished event baby card

Back to my notes:   When I write a project post, I want to tell you exactly what I used so that if you choose to you can duplicate it at home and get the same results.  For example,  when I looked at the picture of my baby card, I thought I had used Early Espresso to stamp and mat the duck.  But checking back at my notes I saw that it is actually Chocolate Chip.

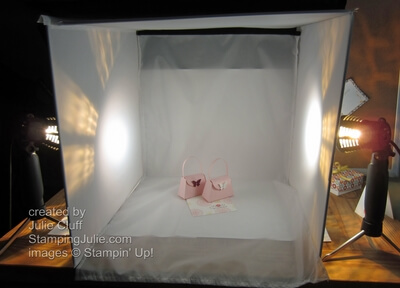
A while back I posted information on my photo process and you can view that post here.

picture taking for blog posts
If you have any questions about this process or anything else :), please leave a comment below and I’ll be sure to answer you!

earn free stamp pads

REMEMBER: 2-WAYS TO GET A SET OF STAMP PADS (a$49.95 value) FOR FREE!  1. Place an order or host a workshop of $450 or more. OR 2. Join my team of stamping friends for just $99 and enjoy all the benefits of membership.

Click Here to Order your Stampin’ Supplies

Click Here for Fun, Easy Digital Scrapbooking! 

Enjoy!  Julie

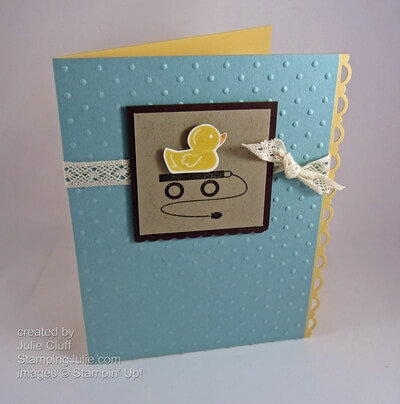
embellished event baby card above

Sweet Ducky Baby Card

embellished event baby card above

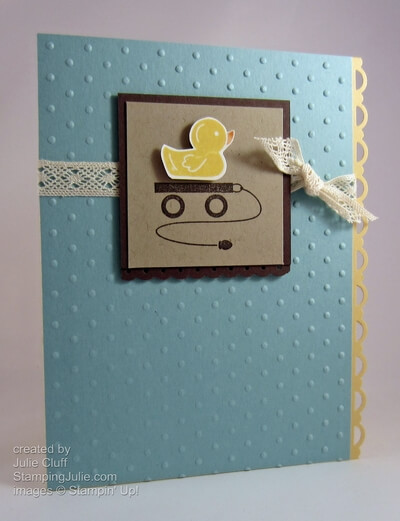
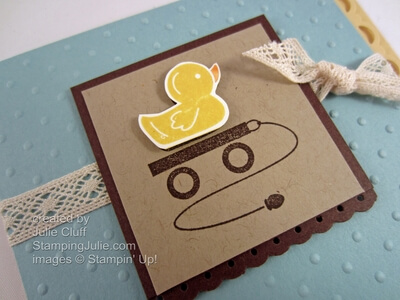
I was inspired by the sweet gift box featured on page 41 in the catalog to create this ‘Happy Baby Card’.  I stamped the duck pull toy from the Embellished Events stamp set on Crumb Cake cardstock with Chocolate Chip.  Then after inking up the stamp with Daffodil Delight, I colored the beak with a Pumpkin Pie marker and stamped on Whisper White.  The little yellow duck was trimmed out with my paper snips, adhered and popped up with Stampin’ Dimensionals.

embellished event baby card detail

The duck square is  layered on matching Chocolate Chip cardstock with a delicate scallop border along the bottom.  To create the scallop border, first trim off the bottom border of the layer.  Then using the Dotted Scallop Ribbon Border Punch, punch out a strip of paper ribbon slightly larger than your layer.  Adhere your paper ribbon under your  main image, and mount the whole piece to the Chocolate Chip layer.  Finally, trim your ribbon even with the sides with your paper snips.

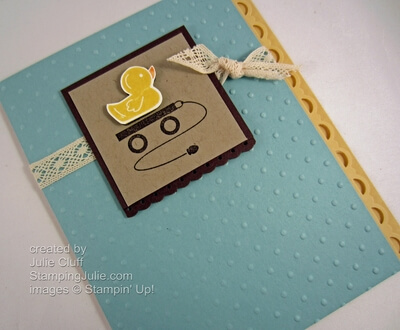
embellished event baby card

The card base is So Saffron cardstock cut to a traditional 5-1/2″ x 8-1/2″ size.  After folding to a 5-1/2″ x 4-1/4″, I used the Scallop Trim Border Punch along the right front before adding the Baja Breeze layer on top.  The Baja Breeze cardstock was cut to cover the front of the card leaving the scallop border on the right exposed.  Before adhering this to the base, I ran it through the Big Shot Die-cutting machine with Perfect Polka Dots embossing folder and tied the Victoria Crochet Trim around it.

I was so tempted to add Crystal Effects to the duck for a glossy finish or add buttons and brads, but I resisted the temptation to gussy-it-up too much.  I love the soft classic feel of this baby card!

earn free stamp pads

REMEMBER: 2-WAYS TO GET A SET OF STAMP PADS (a$49.95 value) FOR FREE!  1. Place an order or host a workshop of $450 or more. or 2. Join my team of stamping friends for just $99.

Joining Stampin’ Up! is a great opportunity to take advantage to all these benefits:

  • A twenty percent product discount!
  • A subscription to Stampin’ Up!’s exclusive demonstrator magazine!
  • Eligibility to attend Stampin’ Up!’s demonstrator-only events!
  • Access to Stampin’ Up!’s demonstrator community, where you can interact with thousands of demonstrators around the world and find tens of thousands of project ideas!

Click Here to Order your Stampin’ Supplies

Click Here for Fun, Easy Digital Scrapbooking! 

Enjoy!  Julie

embellished events baby card close up

Card Recipe: 
Stamps: Embellished Events w-#126495 c-#126497
Ink: Chocolate Chip #126979, Daffodil Delight #126944
Paper: Crumb Cake #120953, Whisper White #100730, Chocolate Chip #102128, So Saffron #105118
Extras: Big Shot Die-cutting machine #113439, Perfect Polka Dots Embossing Folder #117335, Scallop Trim Border Punch #118402, Dotted Scallop Ribbon Border Punch#119275, Crochet Trim #118481, Paper Snips #103579, Stampin’ Dimensionals #104430