Category: Cards

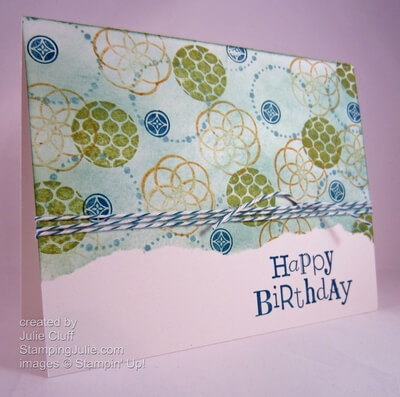
Wacky Wishes Birthday

A Wacky Wishes Happy Birthday

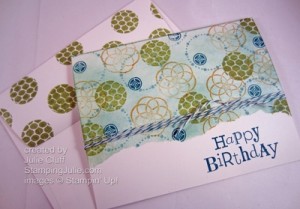
Wacky Wishes Birthday Yesterday we celebrated our son Dallin’s birthday.  I created this one-layer, clean & simple collage card with Stampin’ Up! stamps from Circle Circus  and Wacky Wishes to wish him a happy, happy birthday!  We celebrated at P F Chang’s, his birthday dinner choice.  (Pictures will be added to facebook later today.)

So how did I create this one-layer card?  First I tore a piece of paper to act as a mask.  I placed the torn mask to cover the bottom third of the card and sponged the top third with Baja Breeze ink.  Then, leaving the mask in place, I stamped various circles from in Baja Breeze, Lucky Limeade, More Mustard, and Island Indigo.  The creative color palette came from the Color Coach!
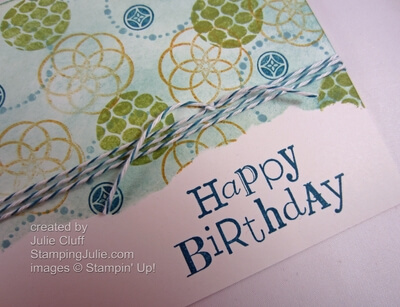
Wacky Wishes Birthday detail Finally I lifted the mask and stamped ‘Happy Birthday’ from the Wacky Wishes stamp set in Island Indigo.   Then I wrapped Island Indigo Bakers Twine around the card three times and tied it in a knot.  I really wanted to tie it in a bow but decided the knot would be more masculine.

THE WACKY WISHES STAMP SET IS A STAMPIN’ REWARD SET. What does that mean?  When you host a party you can receive hostess benefits including exclusive hostess sets that are specially priced.  BUT you don’t have to host a conventional party to receive these rewards.  Any time your order reaches $150 or more in product you can select at least $25 worth of FREE product including exclusive hostess sets.  Click here to view Stampin’ Rewards.

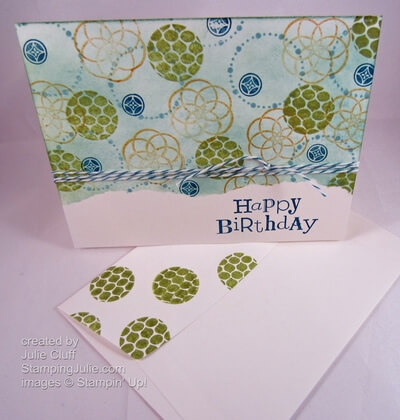
Wacky Wishes Birthday with envelope

I like to make the envelope extra special so the recipient can anticipate what’s inside.  By slipping a piece of scrap paper under the flap I was able to stamp this circle in Lucky Limeade to imitate the design on the card.  I find that stamping on the flap is always an easy envelope solution.

Being a 21-year-old young man, he ripped into the envelope like TNT and all the pretty decorating was demolished, but it’s the thought that counts, right?
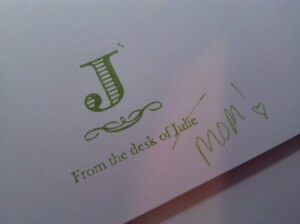
personal stamp mom On the back of his card I stamped my personalized stamp with Lucky Limeade and then added some mom personlization with a Lucky Limeade marker.

DIGITAL DOWNLOADS 50% OFF AND FREE DOWNLOADS AVAILABLE NOW UNTIL NOV. 5TH.  Click here to order.

Click Here to Order your Stampin’ Supplies!

Click Here for Fun, Easy Digital Scrapbooking! 

Like us on Facebook

Follow on Twitter

Enjoy,  Julie

Wacky Wishes Birthday close up with envy

Card Recipe: 
Stamps:  Circle Circus w-#115778 c-#127784, Wacky Wishes (stampin’ reward) w-#126410 c-#126412
Ink: Baja Breeze #126960, Lucky Limeade #126984, More Mustard #126964, Island Indigo #126986
Paper:   Whisper White #100730
Extras: Stampin’ Sponges #101610, Island Indigo Bakers Twine #125575
Carry On Birthday Cupcake Card

Keep Calm & Eat a Cupcake

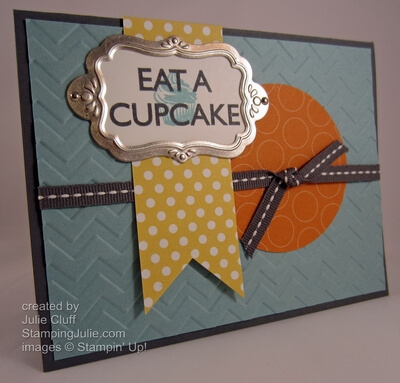
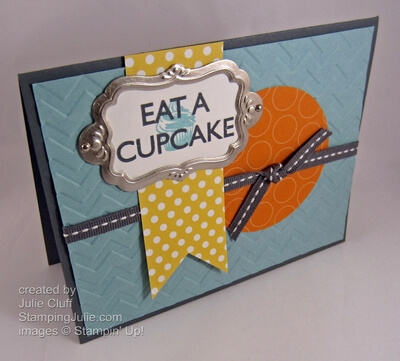
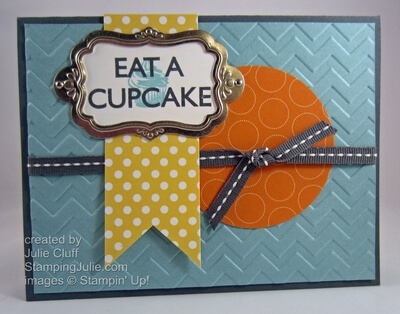
Carry On Birthday Cupcake Card I love playful birthday cards!  This card was designed by my sister during our stamping marathon last month.  She used a different stamp set to make hers and I chose this little cupcake from the Stampin’ Up! Carry On stamp set – love it!  And did you know you can get this stamp set FREE as a Stampin’ Reward with a $150 order.

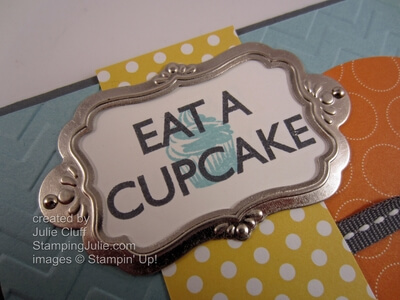
Carry On Birthday Cupcake Card detail Layering stamped images is a great way to increase interest in your designs.  I really love the crisp look of this fun cupcake and the ‘eat a cupcake’ font.  And the Flourish Designer Frame highlights the message with style!

Trendy Chevron embossing and lively polka dots from the Polka Dot Parade Designer Series paper is just perfect for a great birthday wish.  I love using Stampin’ Up! coordinated line of ribbons, ink and papers which makes designing great projects super easy.

Carry On Birthday Cupcake Card above Order Stampin’ Up! Products Here 24/7 (and don’t forget to check out the dozens of new items added to the clearance rack.)

View the Stampin’ Up! Holiday Catalog here

Like us on Facebook

Follow on Twitter

Enjoy! Julie

Carry On Birthday Cupcake Card 2 Card Recipe:
Stamps: Carry On (Stampin’ Rewards) w-# 126645 c-# 126647
Ink:  Basic Gray #126981, Baja Breeze #126960
Paper: Polka Dot Parade Designer Series Paper #126902, Basic Gray #121044, Baja Breeze #111352, Whisper White #100730
Extras: Flourish Designer Frame #127835, Mini Brads #122941, Big Shot Die-cutting Machine #113439, Chevron Emboss Folder #127749, Gray Ribbon #126879
nature walk for you card

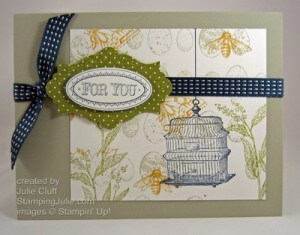
Stampin’ Up! Nature Walk Collage Greeting

nature walk for you card

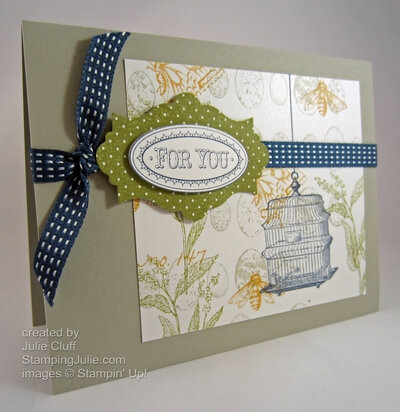
I have always loved the collage style but it doesn’t come naturally to me.  The Nature Walk stamp set makes collage stamping easy and using clear-mount stamps makes it even easier.  I mounted the bee, butterfly and number stamp on one block and stamped them in More Mustard.

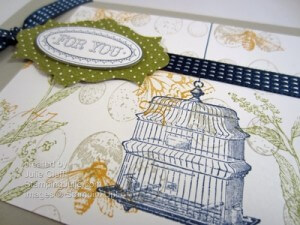
I stamped the bird egg images with Sahara Sand and the floral image with Old Olive.  Finally I stamped the bird cage with Midnight Muse and added a wire hanger with a straight edge and the fine tip Midnight Muse marker.

nature walk for you card bird cage

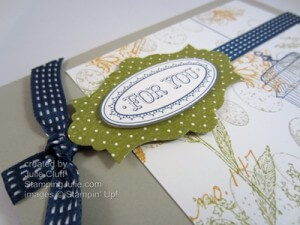
I created the ‘For You’ tag with the Layered Labels stamp set stamped in Old Olive and die-cut with the Apothecary  Accents Framelits.  I stamped it again with Midnight Muse and punched with the large oval punch and layered it all with Stampin’ Dimensionals.  The final touch was knotted on with stitched Midnight Muse ribbon.

nature walk for you card detail

I was going for a simple, sophisticated collage greeting card.  I hope I hit the mark!  What do you think?

Order Stampin’ Up! Products Here 24/7 (and don’t forget to check out the dozens of new items added to the clearance rack.)

View the Stampin’ Up! Holiday Catalog here

Like us on Facebook

Follow on Twitter

Enjoy!  Julie

nature walk for you card 2
 
Card Recipe:
Stamps:  Nature Walk w-#121925 c-#121997, Layered Labels w-#127070 c-#127072
Ink: More Mustard #126964, Old Olive #126953, Midnight Muse #126860, Sahara Sand #126976
Paper: Whisper White #100730, Sahara Sand #121043
Extras: Apothecary Accents Framelits #127003, Big Shot Die-cutting Machine #113439, Large Oval Punch #119855, Stitched Satin Ribbon #126847
Gail's floral frame card

RAK from SJ Reader

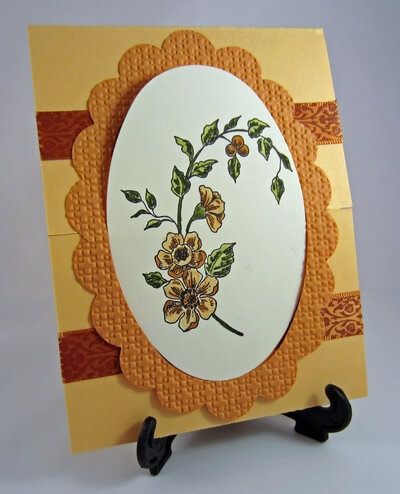
Gail's floral frame card Stamping Julie reader Gail sent me this terrific fall floral card.  Gail writes, “Julie, Thanks for sharing your talent with me on your blog.”  Isn’t that so sweet!  Thank you, Gail, for this lovely thank you card!

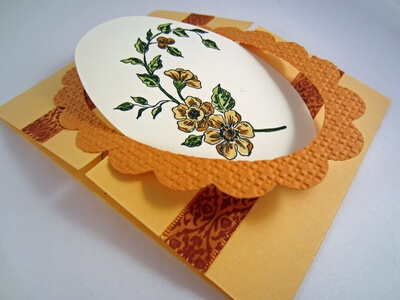
The flowers are beautifully colored with markers and shadowing. She used the Square Lattice Embossing Folder to add texture to her scallop oval frame.  And look how clever the fold is on his card!

Gail's floral frame card open

Would you love to take a stamping class, but the place and time aren’t convenient?  Let me bring the class to you!!  Watch at your convenience from the comfort of your own crafting space!    Click here now for more details and to register.

Order Stampin’ Up! Products Here 24/7

View the Stampin’ Up! Holiday Catalog here

Like us on Facebook

Enjoy!  Julie

embellished events cake with glitter detail

Stampin’ Up! Stamp Coloring How-to Video

embellished events cake with glitter detail

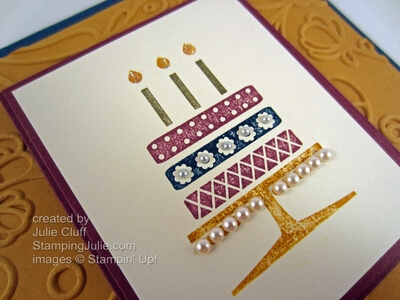
Yesterday I showed you this birthday card I made with the Embellished Events stamp set.  You can see that post here.  I love all the color and in the video below I’ll show you how I color the stamp to get this effect.  Plus I’ll show you how I use the paper-piercing tool to place the adhesive-backed pearls.  Also, I’ll show you how I add glitter to the flames.

Click here to watch the video! or watch it here: http://youtu.be/4175ncvEch0

You will love the Dazzling Diamonds Glitter.  It’s easy to apply anywhere and adds great sparkle to any project.  As you notice in the video, I like to store the glitter in a old Tupperware container, which makes application even that much easier!  Follow me on facebook for more ideas.

DO YOU NEED SOME CREATIVE IDEAS TO MAKE YOUR HOLIDAY SEASON EXTRA SPECIAL?  Sign up now for the October Virtual Stamp camp for new, fun Halloween, Thanksgiving and Christmas ideas.  You’ll receive exclusive 30 minutes of video tutorials with complete instructions for three cards PLUS additional ideas to expand on those projects.  These videos will be longer and more detailed than the videos I feature on the blog.  You’ll also receive specific written instructions for each project.  Stamping demonstrators are welcome too!  Offer ending soon.  Click here now for more details and to register.

Enjoy!  Julie