Keeping It Clean

It’s the beginning of the school year and many of us are looking for ways to keep everything clean and organized and establish a new school-days routine.  Afterall, if we can be efficient in our daily routines, we will have more time for stamping!!!

So today I’m going to introduce you to Clean Mama.

cleanmama.blogspot.com Clean Mama offers  cleaning schedules, inspiration to get it done and tips for staying organized.  She frequently posts free printables and she also offers other tools in her online store.

Enjoy, Julie

(This is just a personal recommendation.  I am not affiliated with clean mama and I have not received any compensation for this post.)
Layered Labels For You Friendship Card angle

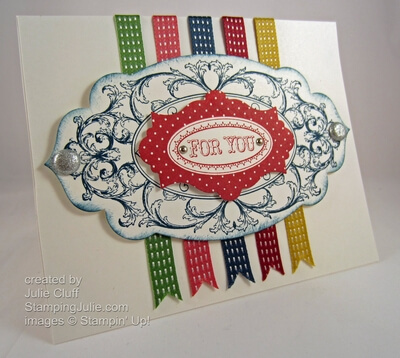
Ribbon Accented, Layered Labels Greeting Card

Layered Labels For You Friendship Card angle

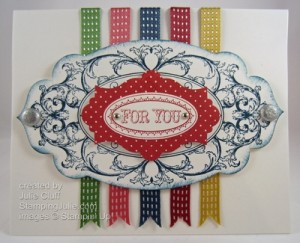
In honor of the In-Color Satin Stitched Ribbon Special (see details at the bottom), I created this ribbon-rich greeting card.

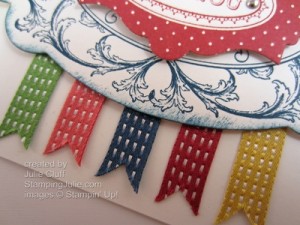
To create the ribbon background, I started with Whisper White card stock cut to  4-1/4″ x 5-1/4″.  I cut 6″ strips of each ribbon and flagged the end by folding it and trimming at an angle from the edge to the folded center.  I use the grid paper all the time, but some projects demand it’s use and this was one of them.   I centered the card stock on the grid paper and secured the first ribbon to the card stock in the center using the grid paper as a guide.  Continuing to use the grid paper to guide placement, I adhered the other ribbons using SNAIL adhesive and then attaching the upper ends to the backside.

Layered Labels For You Friendship Card top

Once the ribbons were in place, I attached the card front to a Whisper White card base to hide the raw edges of the ribbons on the backside.

Layered Labels For You Friendship Card ribbon

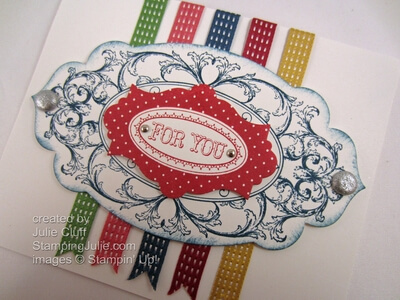
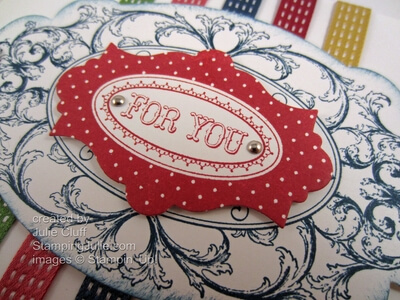
The large label from the Layered Label stamp set was stamped with Midnight Muse and cut out with the Apothecary Accents framelit. I used a Stamping Sponge to sponge a little Midnight Muse around the edges so that it would standout from the white background.

  Layered Labels For You Friendship Card label

The ‘For You’ stamp from the same set was stamped in Raspberry Ripple and trimmed out with the matching framelit.  Mini Silver Brads were added to the tag and Silver Glimmer Brads were added to the outside corners of the large label.

The labels were layered and adhered to the ribbon background with Stampin’ Dimensionals.

Big Shot Die-Cutting Machine

Invest in a Big Shot Die-Cutting Machine, framelits, embossing folders and dies. 

*************************************************************

September 2012 Ribbon Special It’s a ‘Back To Spool” special!  During the month of September get a free spool of ribbon with a $40 product purchase.

Stampin’ Up! announcement:  “While the kids are heading back to school, Stampin’ Up! is going back to ‘spool’! For the month of September, get a FREE package of 3/8″ Stitched Satin Ribbon-an $8.95 value-for every $40 you spend!”

Choose one of the following or place a $200 order and get ALL AND $30 in Stampin’ Rewards.

Enjoy,  Julie

Layered Labels For You Friendship Card

Card Recipe: 
Stamps: Layered Labels w-#127070 c-#127072
Ink: Raspberry Ripple #126859, Midnight Muse #126860
Paper: Whisper White #100730
Extras:  Big Shot Die-Cutting Machine #113439, Apothecary Accents Framelits #127003, Mini Silver Brads #122941, Basics Glimmer Brads #121006, Grid Paper #102787, Sponges #101610, SNAIL Adhesive #104332, Stampin’ Dimensionals #104430
Layered Labels red congratulations card angle

Stampin’ Up! Layered Labels Congratulations CAS

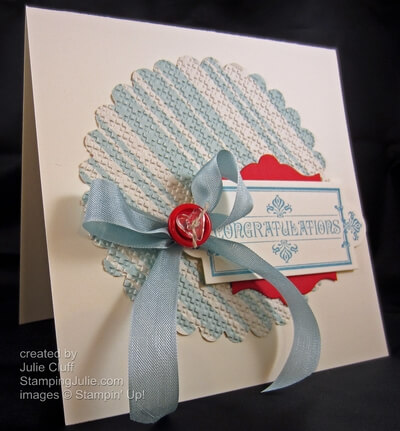
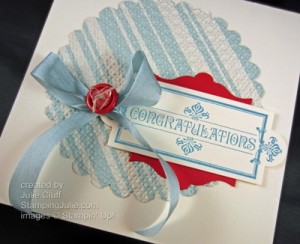
Layered Labels red congratulations card angle What is CAS?  It’s Clean And Simple.  Todays card is a CAS Congratulations card – not too fussy, not too much color or distraction, just cool and calm Baja Breeze and Marina Mist with a pop of vibrant Real Red to get your attention.

The background pattern paper was the starting point for this card so I used the coordinating neutral,  Very Vanilla card stock, cut 11″ x 5-1/2″ as the base (folded to 5-1/2″ x 5-1/2″) to match the Comfort Cafe dsp (designer series paper).  The papers in this dsp pack all have a subtle fabric print, so in keeping with that vibe I used the Square Lattice Embossing Folder after I cropped the Scallop Circle with the Big Shot Die-Cutting Machine.

Layered Labels red congratulations card details

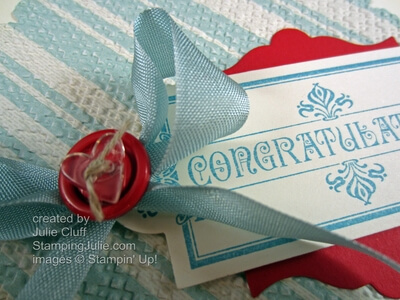
I stamped Congratulations in Marina Mist then die cut it out with the Apothecary Accents Framelits.  (View yesterdays video that demonstrates the Apothecary Accents Framelit.)  I used another Apothecary Accents Framelit to trim out the Real Red Accent.  I cut the die cut in half and layered it behind the top and bottom of the Congratulations label, then attached the label with Stampin’ Dimensionals.

Finally, a Baja Breeze Seam Binding Ribbon bow was added topped using Glue Dots with a Real Red button and clear heart Bitty Button threaded with Linen Thread.

  Layered Labels red congratulations card matching envelope

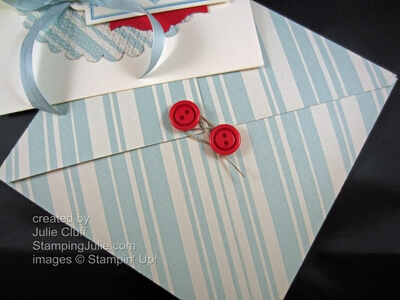
I also made a matching envelope and with the Diagonal Scoring Plate this takes less than a minute to do.  (To view more information and a video on the diagonal scoring plate  click here.) To make this square envelope, cut your paper to 9″ square, score each side diagonally at 4-1/4″, trim out the small triangles where your score lines meet  and fold up.

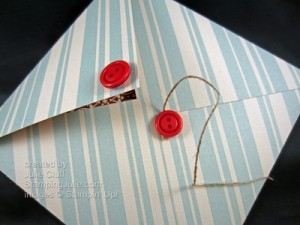
Layered Labels red congratulations card envelope open You’ll notice I added button closure to the back with Linen Thread.  This is a fun feature if you are hand delivering your card, but not so practical for mailing.  🙂 To create this closure, attach the end of the Linen Thread to a Dimensional then to a button.  Adhere the button, thread side down on the envelope.  Then just place the other button on the other side with a Dimensionals.  Now wrap the thread around the buttons to close.

 Enjoy!  Julie

Layered Labels red congratulations card close up

Card Recipe:
Stamps:  Layered Labels w-#127070 c-#127072
Ink: Marina Mist #126962
Paper: Comfort Cafe DSP #126898, Real Red cs #100052, Very Vanilla cs #101650
Extras: Big Shot Die-Cutting Machine #113439, Apothecary Accents Framelits #127003, Scallop Circle Bigz Die #113468, Baja Breeze Seam Binding Ribbon #122331, Linen Thread #104199, Brights Designer Buttons #119747, Bitty Buttons #118761, Dimensionals #104430, Glue Dots #103683, Simply Scored Scoring Tool #122334, Simply Scored Diagonal Plate #125586

Video Tutorial: Stamping Outside the Lines

Today I created a video tutorial to show how I created the framelits panel with “stamping outside the lines.”  Leave me a comment and let me know what you think of these videos and what tutorials you would like to see?  What do you want to learn?!?  I love sharing with you!

Summer Silhouettes thinking of you card angle


If you are reading in email, you can view the video here or http://youtu.be/8Rj4JLBT2SM

Enjoy,  Julie

Summer Silhouettes thinking of you card angle

Summer Silhouette: Color Challenge Design Team

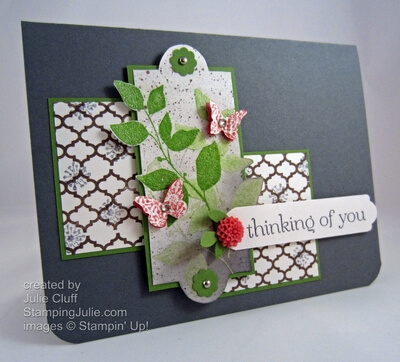
Summer Silhouettes thinking of you card angle I’ve been invited to be on the September design team for the Splitcoaststampers color challenges.  I’m so excited to join a team of super talented ladies and share color inspiration.

This week’s challenge – A Basic Chocolate Gumball; create a card using Basic Gray, Chocolate Chip and Gumball Green.  The extra challenge – to make your own pattern paper background.
Summer Silhouettes thinking of you card detail

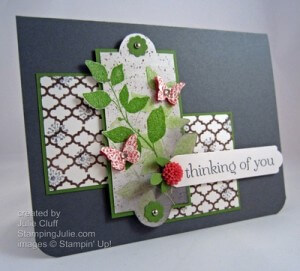
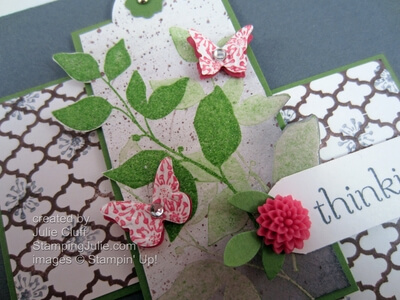
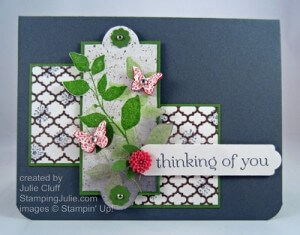
To create this card I started by stamping the leaves from the Stampin’ Up! Summer Silhouette stamp set with versamark and Gumball Green ink, then embossed it with clear embossing powder.

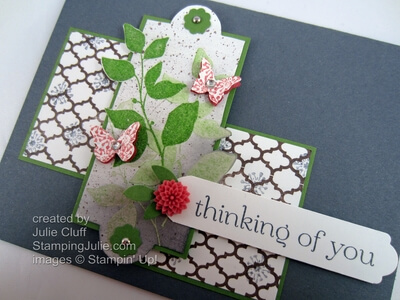
I used the Apothecary Accents Framelits to cut out the leaf panel, but instead of directly die-cutting the label, I die-cut a template.  Then I used a pencil to trace around the template label around the leaves and trimmed it out with Paper Snips, snipping around the leaves that extended beyond the edge.  View the  video tutorial on ‘stamping outside the lines’  here or http://youtu.be/8Rj4JLBT2SM.
Summer Silhouettes thinking of you card flat

I painted the label with a light wash of Basic Gray ink, splattered it with Chocolate Chip ink and, lastly, sponged the bottom right with Basic Gray ink.  I added flower circles punched out with a Itty Bitty Shapes Punch, and Silver Mini Brads to the ends of the lable.

In my sample, I made a pattern paper background for the square accents by first stamping the lattice grid with Chocolate Chip ink and then randomly stamping the small flower burst with stamped-off Basic Gray ink.
Summer Silhouettes thinking of you card butterfly

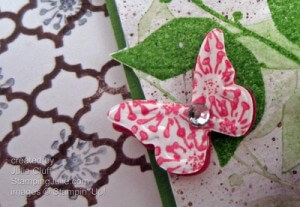
In addition, I added a Primrose Petals accent with the little butterflies and the Dahlias.  To make the butterflies, I created more pattern paper by closely stamping the small flower burst on Whisper White card stock with Primrose Petals before running it through the Beautiful Wings Embosslit and adding a rhinestone.  Each butterfly was also backed with a Primrose Petals butterfly.
Summer Silhouettes thinking of you card tag

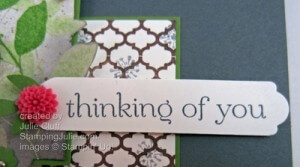
The ‘thinking of you’ tag end was trimmed out by cutting just the end with the side of the a Apothecary Accents Framelit.  The card base is Basic Gray card stock with the corners rounded.

Big Shot Die-Cutting Machine

Want to take your crafting to the next level?  Purchase the Big Shot Die-Cutting Machine.  With the Big Shot, you can add texture and fabulous die-cut accents I use my Big Shot on almost every project and it’s super versatile and easy to use.

Enjoy, Julie
Summer Silhouettes thinking of you card

Card Recipe:
Stamps: Summer Silhouettes w-#126445 c-#126447, Sweet Essentials w-#126455 c-#126457
Ink: Gumball Green #126861, Chocolate Chip #126979, Basic Gray #126981, Primrose Petals #126858, VersaMark #102283
Paper: Gumball Green #126840, Basic Gray #121044, Primrose Petals #126841, Whisper White # 100730
Extras: Big Shot Die-Cutting Machine #113439, Apothecary Accents Framelits #127003, Beautiful Wings Embosslits #118138, Bird Builder Punch #117191, Itty Bitty Shapes Punch Pack #118309, Corner Punch #119871, Mini Silver Brads #122941, In Color Dahlias #127556,  Basic Jewels Rhinestones #119246, Glue Dots #103683, Stampin’ Dimensionals #104430, Sponges #101610