Tagged: framelits

Secret Garden Ciao Baby love card

Secret Garden, Ciao Baby!, Love Card

Secret Garden Ciao Baby love card

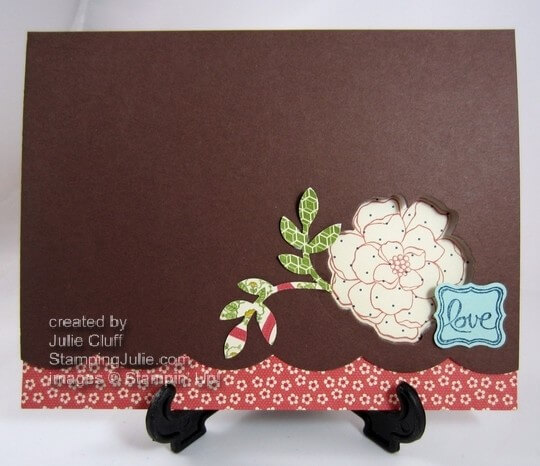
I decided on a peek-a-boo card today.  Coordinating framelits make it soooo super-dooper easy to do.  Unlike punches you can place and cut your framelit shape anywhere on the cardstock.  Super handy!  Right?!

Also, I photographed this on the stand because I adhered the pattern paper on the inside of the card and cut the wide scallop edge from the front of  the card, so if I had photographed it open the scallop edge would have been resting on the surface and you wouldn’t be able to see the lovely little flower pattern below.  And that would be a crying shame!

Secret Garden Ciao Baby love card detail

In addition to the little flowers paper below the scallop, I used the Print Poetry Designer Series Paper Pack for the leaves and the flower too.  The leaves were punched from the Bird Builder Punch and the flower was stamped and cut with the Secret Garden  stamp and framelit.

Here’s the easy-peasy way to get your peek-a-boo flower to match up perfectly inside your card.  It isn’t rocket science, I swear. Just place and cut with your framelit where you want your opening in the front cardstock.   Then stamp your flower on cardstock or pattern paper (in this case print pack) and cut it out with the same framelit.  Then place adhesive on the back of your flower, close your card front and adhere the flower through the opening onto the inside of the card.  Simple!

Secret Garden Ciao Baby love card close up

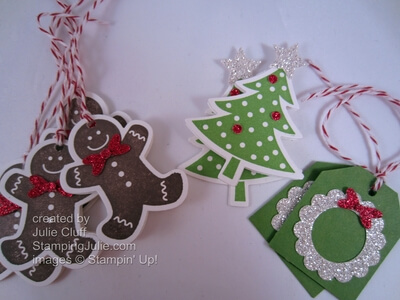
Here’s another angle.  The love tag was simply stamped from the Caio, Baby! stamp set on Pool Party cardstock and punched out with the Petite Curly Label Punch (available FREE with a Sale-a-bration order Jan. 22nd).

Secret Garden Ciao Baby love card inside

And this is what you see when you open the card.  I cut the pattern paper with the scallop framelit also.  And “Oh happy day!” is another sneak peek from a Sale-a-bration stamp set, Bloomin’ Marvelous.

GET EXCITED ABOUT SALE-A-BRATION STARTING JANUARY 22ND!  For every $50 product purchase you recieve a FREE  stamp set or accessory of your choice.  SAB time is a great time to expand your crafting supplies so that you have what you need when you need it.  Click here for the complete list of SAB products!

Enjoy!  Julie

Secret Garden Ciao Baby love card

Card Recipe:
Stamp Set and Framelit Bundle:  Secret Garden* wood-mount #131100 clear-mount #131099
Stamps: Bloomin’ Marvelous**, Ciao Baby!* wood-mount #129645 clear-mount #129648
Ink: Raspberry Ripple #126859, Midnight Muse #126860
Paper: Print Poetry Designer Series Paper Pack* #129312, Pool Party cardstock #122924, Chocolate Chip cardstock #102128, Whisper White cardstock #100730
Extras: Big Shot Die-cutting Machine #113439, Large Scallop Edgelit #127019, Bird Builder Punch #117191, Petite Curly Label Punch**
*Spring Catalog
**Sale-a-bration exclusive product, available FREE on Jan 22nd.


Merry Christmas Trees in Review

Christmas Trees have certainly been a theme this holiday season on StampingJulie.com.  I’m a little sad to see Christmas coming to an end.  I can’t tell you how much fun I have had making Christmas projects to share with you.  And with the end of the holiday season comes the end of the Stampin’ Up! Holiday Catalog.

Here’s some of the highlights of the Christmas tree cards I’ve shared with you this season:

sweet essentials glimmer spritz christmas tree card

Just a folded Christmas tree and lots of glittery sprays!!  Shimmer Folded Christmas Tree Card 

Scallop Ruffle Christmas Tree Card

A ruffle Christmas tree card made with lots of punched and layered Christmas paper scallops.  Pennant Ruffle Christmas Tree Card

lovely as a tree starry night Christmas card

Definitely one of my favorite Christmas tree cardsLovely as a Tree Starry Night Christmas Tree Card and video tutorial.

sweet essentials folded Christmas tree card

Another folded Christmas tree card with non-traditional colors.  Folded Christmas Tree Card and video tutorial. 

Scentsational Season Christmas Tree

Another favorite!  I love the feel of the paper: it’s so rich feeling after embossing and heat embossing with sparkle.  And the tree is cut out of the background with the green polka dot paper peeking out from behind.  Glittery Paper Christmas Tree Card

holiday collection gift card

 And the matching gift card from the scraps of the last card.  Holiday Collection Gift Card

Joyous Celebrations Folded Christmas Tree Gift card

This little gift card that fits in the envelope made from the Scallop Envelope Bigz Die was the beginning of the folded Christmas tree crazeJoyous Celebrations Folded Christmas Tree card 

That’s the parade of Christmas trees in review!!

Merry Christmas!  Julie

Christmas gift tags scentsational season

Last Minute Christmas Gift Tags

Christmas gift tags

I made lots of last minute Christmas gift tags today.  I checked my wrapping paper first to match my colors.  I’ll be wrapping presents tomorrow and I’ll have lots of tags to choose from!!  I could have made these tags for hours; I was having so much fun and I kept thinking of new ideas.  I finally just had to stop!!  I seriously have to look into a crafter’s anonymous  group to join.

I thought I would share a few them with you in case you needed to make some last minute tags too!

christmas gift tags two tags die

These are the most involved tags I made.  I cut these Real Red and Gumball Green cardstock with the Two Tags Bigz Die.  The great thing about this die is you can cut about four pieces at a time.  The stocking on the left are from the Owl Occasions stamp set, the reindeer are from the Joyous Celebrations set and the tree, the candy cane and gingerbread man are from the Scentsational Seasons set, cut out with the matching framelits dies.

The rick rack is cut from the Tasteful Trim Bigz Die, and I added Dazzling Details glitter glue to the cut outs.  I added a Red Glimmer Paper heart punched from the Owl Builder punch to the stocking tag.  I colored a rhinestone with a red sharpie marker to give the reindeer a Rudolf nose.

christmas tags punch

I used the Tag punch to make these basic tags.  Rudolf, 25 and the Christmas trees were stamped from the Joyous Celebrations stamp set and punched out with the Postage Stamp punch.

christmas gift tags joyous celebrations trees

I added a rhinestone on the star and red Dazzling Diamonds glitter glue ‘Christmas balls’ on the trees.

Christmas gift tags joyous celebrations Rudolf

This time I used a small punched circle of Red Glimmer Paper for Rudolf’s nose.

Christmas gift tags joyous celebrations december 25

And who knew that the circle punches from the Cupcake Builder punch is just the right size to add Glimmer Paper to dress up this December 25 tag.

christmas gift tags merry mini punch

The ornament and trees here are punched out using the Merry Minis punches.  To create the tags with the peek-a-boo circle, first punch a 3/4″ circle from the paper then punch around it with the tag punch and back it with a contrasting tag punch, then center your tree or ornament in the middle.  I love this Silver Glimmer Paper tag.

Christmas gift tags scentsational season

The Scentsational Season gingerbread man and Christmas tree actually open like a card.

christmas tags scentsational season open

To create this little card fold your card stock in half and place your framelit over the fold.  I only used Whisper White cardstock for this, as it is lighter weight than the other cardstocks and the framelits are intended to just cut through one piece of paper, so be careful if you try this.  Then stamp the gingerman or tree, cut them out and glue to the front of the folded shape.

christmas tags scentsational season gingerbread man

His Red Glimmer paper bowtie is made with two hearts from the Owl Builder punch, with a small circle punch connecting them into a bow.  I discovered that I could place the points of the hearts on a glue dot, then wrap the glue dot around the points and add the circle  onto the wrapped glue dot.  After assembling the bowtie on the glue dot, it was easy to place onto the cute little guy.

christmas tags scentsational season tree

I added just a couple of Red Glimmer paper punched circles onto the tree for fun and a Glimmer paper star to the top.

christmas tags glitter wreath

It’s amazing how easy it is to create this little glittery wreath tag.  Punch a 3/4″ circle in the Silver Glimmer paper, then punch around the circle with the 1-1/4″ scallop circle.  The bow is made the same way as the gingerbread man’s bowtie.  To adhere to the bowtie to the glittery wreath, use multipurpose liquid glue to assure good sticking power!

I hope you enjoyed these fun tags and I hope my family likes them too!!

Merry Christmas!  Julie

Scentsational Season Top Note Gift Card Holder

Top Note Gift Card Holder Tutorial

Scentsational Season Top Note Gift Card Holder

Once again this Top Note Gift Card Holder was inspired by a Stampin’ Up! demonstrator blog.  A perk I love about being a SU demo.  This card looks involved but it is actually quite easy to make.  View the video tutorial below and I’ll walk you through the quick steps to creating this ‘scentsational’ card.

Scentsational Season Top Note Gift Card Holder with card

Cut your cardstock 4-1/4″ x 11″ and score at 4-1/2, 5-1/2 & 6-1/2, then follow the directions in the video to run your scored cardstock through the Big Shot Die-cutting Machine with the Top Note Bigz Die and create the pop up gift card holder shown above.

 To decorate the front of the card, I die-cut a piece of the Be of Good Cheer Designer Series Paper to fit on the front and cover the left edge of the gift card holder.  I punched a large circle of Gumball Green cardstock and layered the fun, steaming mug from the Scentsational Season Stamp Set with the matching Holiday Framelit dies.

Scentsational Season Top Note Gift Card Holder detail

The Merry Christmas sentiment from Wacky Wishes Hostess stamp set was stamped in Cherry Cobbler, and it punched out perfectly with the Extra-Wide Oval punch.

Scentsational Season Top Note Gift Card Holder mug

A little dazzling details glitter and some rhinestones add extra glitz to the Soft Suede mug. And another large circle in Whisper White in the interior gives you a place to write a personal message.

Scentsational Season Top Note Gift Card Holder inside

Check out the complete supply list below and click on the links for pictures and descriptions.

Enjoy! Julie

Card Recipe:
Stamps: Wacky Wishes Hostess Set w-#126410 c-#126412, Scentsational Season Bundle with matching framelits w-#129945 c-#129946
Ink: Cherry Cobbler #126966, Soft Suede #126978, Crumb Cake #126975
Paper:  Cherry Cobbler cardstock #119685, Gumball Green cardstock #126840, Be of Good Cheer Designer Series Paper #126896, Whisper White cardstock #100730
Extras:  Big Shot Die-cutting Machine #113439 , Top Note Bigz Die #113463, Extra-Wide Oval Punch #119859, 2-1/2″ Circle Punch #120906
Holiday Collection Christmas Tree Card

Glittery Paper Christmas Tree Card

Holiday Collection Christmas Tree Card

I’m always experimenting so I can bring you more ideas to spark your creativity.  This was fun to make with designer paper, framelit dies, an embossing folder and iridescent ice embossing powder.  As soon as I saw this green polka dot paper in the Be of Good Cheer Designer Series Paper pack, I knew is was perfect for a Christmas tree. I wanted to do something more interesting than simply die-cutting the shape from the paper so I used it to show case the die-cut Christmas Tree through the coordinating paper.

I started with Very Vanilla cardstock cut 4-1/4″ x 11″, then layered green polka dot paper over that measuring 4″ x 10-3/4″.  When I adhered the pattern paper I only glued down to the top of the Very Vanilla on the front and the back.  I wanted the layers to be separate so they would really stand out.  Here’s some pictures so you can see the layers better.

Holiday Collection Christmas Tree Card side

Holiday Collection Christmas Tree Card layers

Holiday Collection Christmas Tree Card layers

I ran a 4-1/4″ x 5-1/2″ piece of the red and green snowflake paper through the Big Shot Die-cutting Machine in the Petals-a-Plenty Embossing folder.  Then I ran it through again with the Christmas tree framelet die from the Holiday Collection dies.  Finally I brayered Versamark lighly over the paper and add Iridescent Ice embossing powder to the raised pattern for a glittery effect.  Then I adhered this piece to the front at the top.  Can you see the texture and the glimmer of the embossing in this photo?

Holiday Collection Christmas Tree Card tree detail

Finally, I added the Red Glimmer Paper star, also cut out from the Holiday Collection framelit dies, and tied the baker twine around the top.

The links to the products I used in this card are below.

Click Here to Order your Stampin’ Goodies!

Enjoy! Julie

Holiday Collection Christmas Tree Card Tree

Card Recipe:
Ink: VersaMark #102283
Paper: Be of Good Cheer Designer Series Paper #126896, Very Vanilla cardstock #101650, Red Glimmer Paper #101790
Extras: Holiday Collection Framelit Dies #127814, Petals-a-Plenty of Embossing Folder #116824, Big Shot Die-cutting Machine #113439, Bakers Twine #123125, Iridescent Ice Embossing Powder #101930