Tagged: embossing

Top Note Gift Card Purse with card

Stampin’ Up! Top Note Gift Card Purse

Top Note Gift Card Purse with card

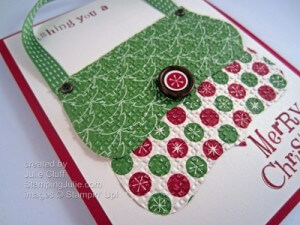
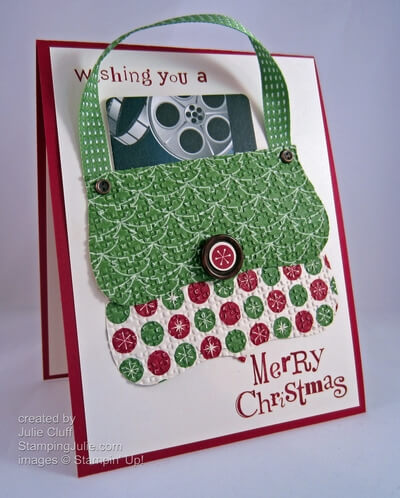
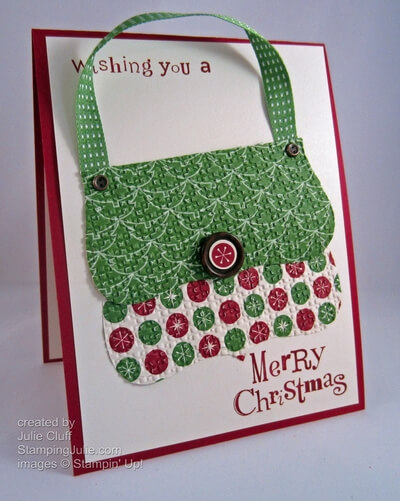
I love Stampin’ Up! Big Shot dies!  And the Top Note Bigz Die is so versatile.  I used it here to create this adorable purse and tucked a gift card in the top.  Using dies allows me to make complicated-looking projects in a snap.  I created the purse by die-cutting Be of Good Cheer holiday paper in my Big Shot Die-cutting Machine with the Top Note die and then folding it down the top.  With a couple of quick snips the purse was complete.  Stay tuned this week for a video tutorial on making this cute purse.

Here it is without the gift card:

Top Note Gift Card Purse

One of the many advantages of being a Stampin’ Up! demonstrator is having access to exclusive ideas provided by my upline which is where I got this cute purse idea.  Now is a great time to become a demonstrator – whether it’s just to enjoy the discount and exclusive content or  to start your own business – and receive a full set of stamp pads (10!) absolutely FREE.  And you create your own starter kit too!

earn free stamp pads

REMEMBER: 2-WAYS TO GET A SET OF STAMP PADS (a$49.95 value) FOR FREE!  1. Place an order or host a workshop of $450 or more. OR 2. Join my team of stamping friends for just $99 and enjoy all the benefits of membership.  (Offer available now until December 16th.)

Enjoy!  Julie

Top Note Gift Card Purse detail

Card Recipe:
Stamps: Wacky Wishes (hostess set) w-#126410, c-#126412
Ink: Cherry Cobbler #126966
Paper:  Be of Good Cheer #126896, Cherry Cobbler cardstock #119685, Very Vanilla cardstock #101650
Extras: Top Note Bigz Die #113463, Big Shot Die-cutting Machine #113439, Naturals Buttons #127554, Vintage Trinkets #118764,  Gumball Green Stitched Satin Ribbon #126848
(click on links for full product description and picture)
Holiday Collection Gift Card

Holiday Collection Gift Card

Holiday Collection Gift Card

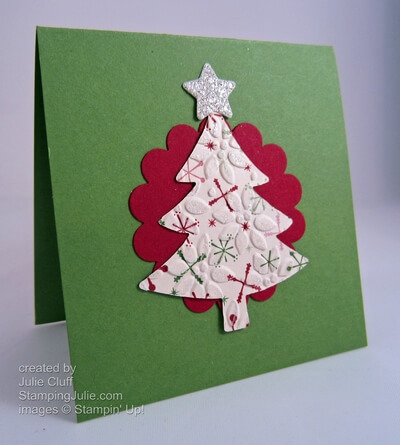
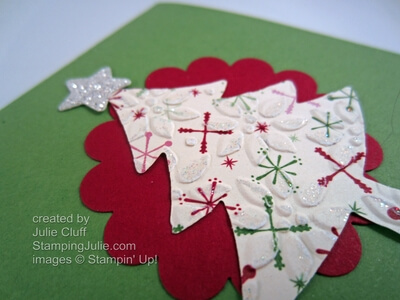
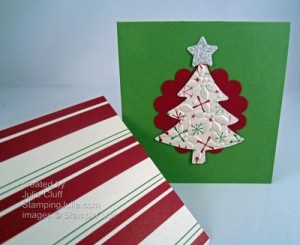
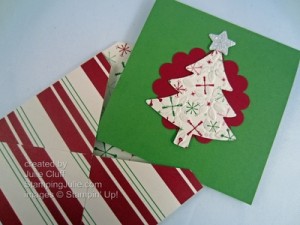
When I finished the Glittery Paper Christmas Tree Card I had these scraps left over to make this little gift card that measures 3″ square.  All I had to make was the Gumball Green 3″ square card base and adhere the pieces.  The tree was cut out from the tree ‘window’ I created for the Christmas tree card with the paper I embossed with the Petals-a-Plenty embossing folder and then heat embossed with iridescent ice embossing powder.  So it’s shimmery!

Holiday Collection Gift Card glitter tree

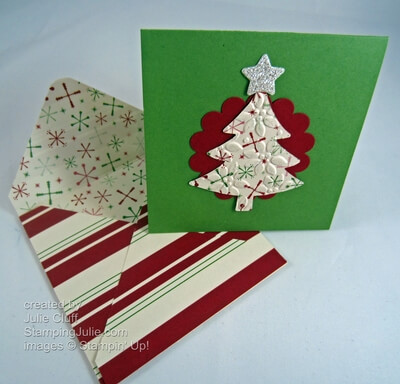
I took a square of Be of Good Cheer Designer Series Paper and created a matching square envelope with my Diagonal Scoring Plate.  With that scoring tool it literally takes seconds to make a matching envelope.

Holiday Collection Gift Card with envelope

And the cool thing is the stripes of that paper are on a diagonal so when I folded up the envelope the stripes were straight across and created a great place to add the recipient’s name.  I used the card yesterday when I delivered some Stampin’ Up! product to a friend.

Holiday Collection Gift Card envelope front

The links to the products I used in this card are below.

earn free stamp pads

REMEMBER: 2-WAYS TO GET A SET OF STAMP PADS (a$49.95 value) FOR FREE!  1. Place an order or host a workshop of $450 or more. OR 2. Join my team of stamping friends for just $99 and enjoy all the benefits of membership.

Click Here to Order your Stampin’ Goodies!

Enjoy! Julie

Holiday Collection Gift Card in envelope

Card Recipe:
Ink: VersaMark #102283
Paper: Be of Good Cheer Designer Series Paper #126896, Cherry Cobbler cardstock #119685, Gumball Green cardstock #126840, Silver Glimmer Paper #124005
Extras: Holiday Collection Framelit Dies #127814, Petals-a-Plenty of Embossing Folder #116824, Big Shot Die-cutting Machine #113439, Bakers Twine #123125, Iridescent Ice Embossing Powder #101930, Brayer #102395, 1-1/4″ Scallop Circle Punch #127811
Holiday Collection Christmas Tree Card

Glittery Paper Christmas Tree Card

Holiday Collection Christmas Tree Card

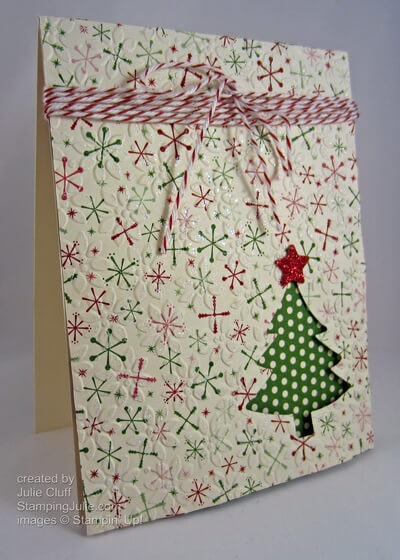
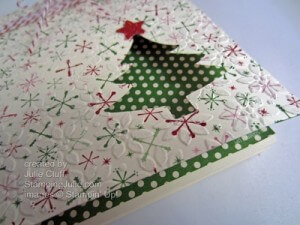
I’m always experimenting so I can bring you more ideas to spark your creativity.  This was fun to make with designer paper, framelit dies, an embossing folder and iridescent ice embossing powder.  As soon as I saw this green polka dot paper in the Be of Good Cheer Designer Series Paper pack, I knew is was perfect for a Christmas tree. I wanted to do something more interesting than simply die-cutting the shape from the paper so I used it to show case the die-cut Christmas Tree through the coordinating paper.

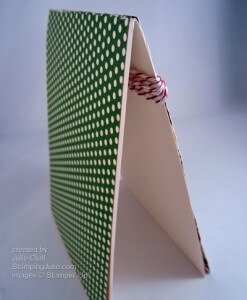
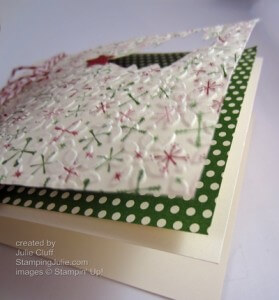
I started with Very Vanilla cardstock cut 4-1/4″ x 11″, then layered green polka dot paper over that measuring 4″ x 10-3/4″.  When I adhered the pattern paper I only glued down to the top of the Very Vanilla on the front and the back.  I wanted the layers to be separate so they would really stand out.  Here’s some pictures so you can see the layers better.

Holiday Collection Christmas Tree Card side

Holiday Collection Christmas Tree Card layers

Holiday Collection Christmas Tree Card layers

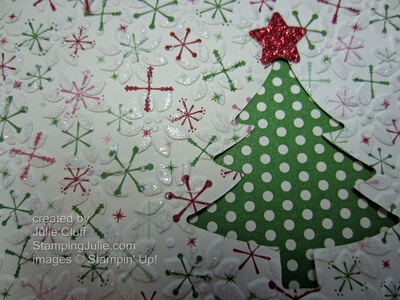
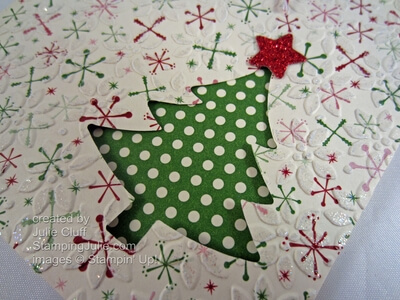
I ran a 4-1/4″ x 5-1/2″ piece of the red and green snowflake paper through the Big Shot Die-cutting Machine in the Petals-a-Plenty Embossing folder.  Then I ran it through again with the Christmas tree framelet die from the Holiday Collection dies.  Finally I brayered Versamark lighly over the paper and add Iridescent Ice embossing powder to the raised pattern for a glittery effect.  Then I adhered this piece to the front at the top.  Can you see the texture and the glimmer of the embossing in this photo?

Holiday Collection Christmas Tree Card tree detail

Finally, I added the Red Glimmer Paper star, also cut out from the Holiday Collection framelit dies, and tied the baker twine around the top.

The links to the products I used in this card are below.

Click Here to Order your Stampin’ Goodies!

Enjoy! Julie

Holiday Collection Christmas Tree Card Tree

Card Recipe:
Ink: VersaMark #102283
Paper: Be of Good Cheer Designer Series Paper #126896, Very Vanilla cardstock #101650, Red Glimmer Paper #101790
Extras: Holiday Collection Framelit Dies #127814, Petals-a-Plenty of Embossing Folder #116824, Big Shot Die-cutting Machine #113439, Bakers Twine #123125, Iridescent Ice Embossing Powder #101930
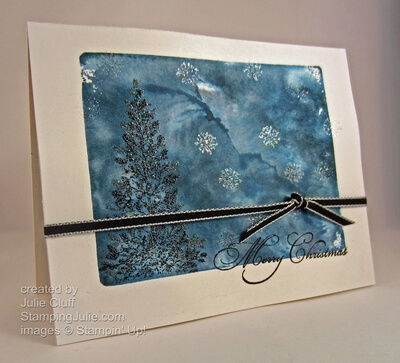
Lovely as a Tree Starry Night Christmas

Lovely as a Tree Starry Night Christmas

Lovely as a Tree Starry Night Christmas

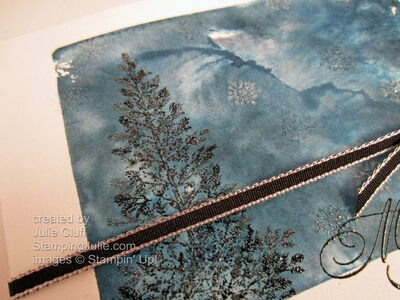
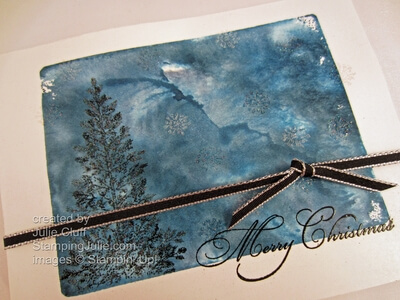
I have loved this pine tree from the Lovely as a Tree stamp set since I first got this set years ago.  Can’t believe it’s still available in this year’s Stampin’ Up! catalog.  I used it as a silhouette on this simple Christmas card.  I saw a challenge on splitcoast stampers to be inspired by this quote, “ I have loved the stars too fondly to be fearful of the night” from Galileo.  That was the challenge and this is the card that it inspired me to make.

I started with the large ‘E’ acrylic block, smudged it with Midnight Muse, Night of Navy and Not Quite Navy stamp pads, spritzed it with water and stamped with the block.  You need a good but of spritzed water on the block in order for the colors to blend together so you get good coverage.  I used my heat tool to dry the paper after stamping. 

Lovely as a Tree Starry Night Christmas detail

I used some paper and post-it notes to mask the bottom and side edges, stamped the tree in Black Craft Ink and embossed with Iridescent Ice embossing powder.  I really wanted the shimmer of the Iridescent Ice embossing powder, but the tree wasn’t very visible, so I stamped it again with the Black Craft Ink and embossed again with black embossing powder.  That did the trick.  I got the shimmer and enough black silhouette so it would show up on the dark blue background. 

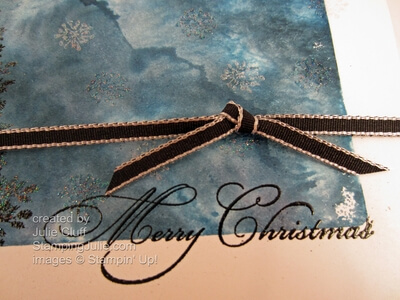
I used the small starburst stamp from the Summer Silhouette stamp set to stamp stars in the sky with VersaMark and the White Stamp Pad and embossed the stars with Iridescent Ice embossing powder.  Then I add the Merry Christmas sentiment with Black Craft Ink and the black embossing powder.  (I wanted a script Merry Christmas so I used this retired stamp, but any of the stamps from the Greetings of the Season stamp set would have been perfect and beautiful!)

Lovely as a Tree Starry Night Merry Christmas

With the water-spritzed-block stamping and heat embossing, the paper became quite warped, so I layered it on a Natural White cardstock base to smooth it out and added the black ribbon which really added just the right amount of contrast, texture and interest.

Online Extravaganza Sale ends Wednesday, November 28th 20%-50% off of Stampin’ Up! goodies. Click here now to view everything that’s on sale.

Click here to place your order now

Stampin' Up! Sale

Enjoy!  Julie

Lovely as a Tree Starry Night Christmas close up

Card Recipe:
Stamps:  Lovely as a Tree w-#115026 c-#127793, Summer Silhouettes w-#126445 c-#126447
Ink: Midnight Muse #126860, Night of Navy #126970, Not Quite Navy #126971, Black Craft #102192, White Craft #101731, VersaMark #102283
Paper:  Whisper White cardstock #100730, Natural White cardstock #102316
Extras: Acrylic Block #118484, Iridescent Ice Embossing Powder #101930, Black Embossing Powder #109133, Black Taffeta Ribbon #119261, Heat Tool #129053
World Treasures stationary kit close up

World Treasures Personalized Stationary

World Treasures stationary kit close up

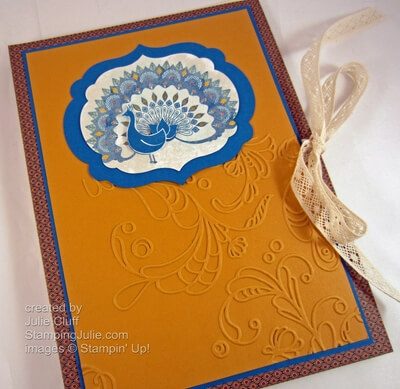
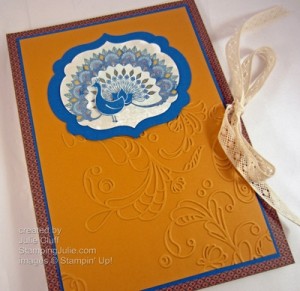
Inspired by the sample on page 147 of the catalog and the birthday gifts my sister made for her friends,  this personalized stationary kit is fabulous.  I chose the International Bazaar Designer Series Paper as a jumping off point.  The paper dictated the colors I used: Pacific Point and More Mustard.  It’s a vibrant palette, don’t you think?

(Scroll to the bottom of the post for the complete supply list linked to the product picture and description.)

World Treasures stationary kit peacock

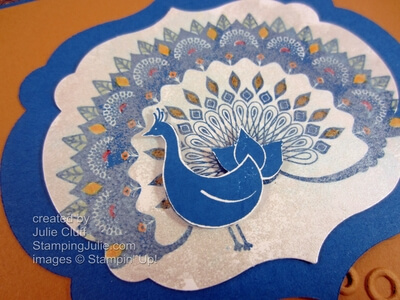
I stamped the peacock from the Stampin’ Up! World Treasures stamp set in Pacific Point and colored in some feathers with my Many Marvelous Markers.  Now here’s the fun part, which is really hard to detect in the photos.  After cropping the peacock out with the Labels Collection Framelit, I covered the stamped and colored label with Shimmer Paint using a sponge daubers.   It gives it such soft, classy sparkle.

I stamped the peacock again, cut out the body and adhered that with Stampin’ Dimensionals.  Then I adhered the peacock lable to a larger label cut from Pacific Point cardstock.  Stampin’ Up!’s coordinating papers and inks makes crafting so satisfying – you always get great results because it matches!

World Treasures stationary kit personalized

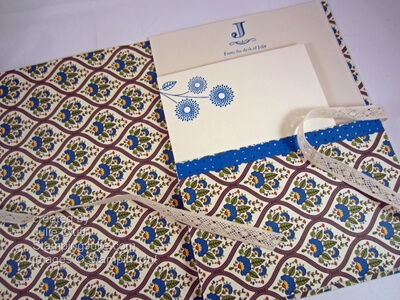
The interior has a pocket for holding stationary and envelopes.  I used the Scallop Border Ribbon Punch to finish off the edge of my pocket.  You’ll notice that I didn’t plan ahead correctly and I cut my paper so that my design is sideways.  Don’t make the same mistake I did – double check your design orientation before you cut!  What’s the saying?  “Measure twice, cut once.”  I should have checked twice and then cut.

World Treasures stationary kit

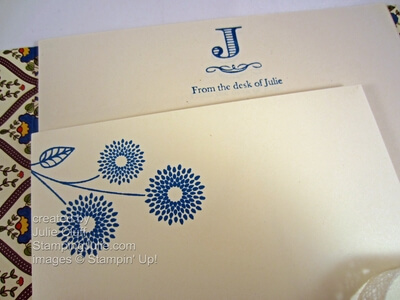
Above is a close up of the stationary.  I used creamy, lightweight paper cut in half  and stamped in Pacific Point with a Monogram Stamp to create the stationary.  The matching envelopes are Very Vanilla envelopes stamped with the flower from the same World Treasures stamp set as the peacock.

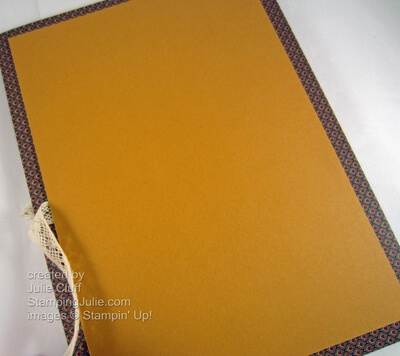
Below is a picture of the back, layered with the matching More Mustard cardstock.  The cardstock layer adds sturdiness and also covers the end of the Victorian Crochet Lace ties.

World Treasures stationary kit back

These stationary sets are great gifts for friends for birthdays or Christmas.  Include a Personalized stamp with the matching stamp pad and it’s a gift they will enjoy for a very long time.

DON’T FORGET TO LEAVE A COMMENTSAY HELLO and let me know what you think.  🙂

Enjoy!  Julie

World Treasures stationary kit close up

Card Recipe:
Stamps: World Treasures w-#126765 c-#126767
Ink: Pacific Point #126951
Paper: International Bazaar Designer Series Paper #126920, More Mustard cardstock #100946, Pacific Point cardstock #111350, Whisper White  cardstock #100730
Extras: Labels Collection Framelits #125598, Elegant Lines Embossing Folder #119277, Big Shot Die-cutting Machine #113439, Victorian Crochet Trim #118481, Frost White Shimmer Paint #116854, Sponge Dauber #102892, Many Marvelous Markers #119806, Dotted Scallop Ribbon Border Punch #119275