Tagged: 3-d project

Great Thanksgiving Feast Setting

Thanksgiving table setting
This great thanksgiving setting is from Stampin’ Up!  Sara Brook from the  Stampin’ Up! My Digital Studio Team said, “Inspired by the fall season and the growing fashion trend of geometrics — the Unknown Blessings Ensemble for Thanksgiving is fabulously fresh! I have put together a faux place setting using the Unknown Blessings Ensemble.”

Sara goes on to explain how she did it.  “The feather headband can be assembled quickly by using the feather punches (digital punch included in download). Simply snip out the feather punches, fold in half, and cut freehand notches to create a feather effect.

“The headband is made from the Designer Series Papers, which can also be used as placemats at their full size. Cut the size (for the band) that you want from any of the patterns and then double or triple-up the band to fit the circumference of the person’s head. Attach the chosen headband pieces together, as well as the feathers to the back of the band; then wear and enjoy!

thanksgiving digital download

Sara continues, “The napkin rings are made the same way as the feather headbands, just with smaller stackable feathers and a smaller band. The smaller feathers can also be used as fun table confetti!

“The colorful pie box makes for a killer gifting and presentation piece. After the templates have been printed, cut out and score along the folding edges, fold the sides, attach the flap pieces on the inside of the box with an adhesive, line the box with wax paper, and then insert the treat.

“You will for sure be a fashionable Pocahontas this Thanksgiving with this fresh take on traditional festivities.”

unknown blessings thanksgiving ensemble The Unknown Blessings Thanksgiving digital download includes: 7  1-page décor designer templates: invitation, place cards, pie box, napkin rings, menu cards, framable décor, feathers (8-1/2″ x 11″); double-sided postcard designer template (9 x 4-1/4″); 17-piece SVG stamp brush set; 6 Designer Series Papers; 8 embellishments and 1 punch.

GET STARTED DESIGNING with My Digital Studio 2:  download FREE 30-day trial   or  download My Digital Studio 2  or  download My Digital Studio 2+ (great value, includes $500 in digital content).

VIEW THE LATEST DIGITAL DOWNLOADS HERE.

Enjoy, Julie

World Treasures stationary kit close up

World Treasures Personalized Stationary

World Treasures stationary kit close up

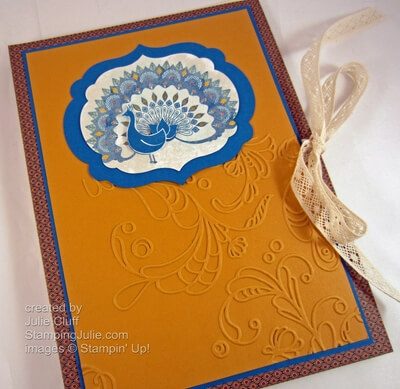
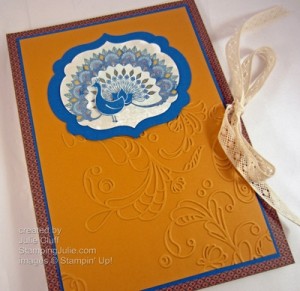
Inspired by the sample on page 147 of the catalog and the birthday gifts my sister made for her friends,  this personalized stationary kit is fabulous.  I chose the International Bazaar Designer Series Paper as a jumping off point.  The paper dictated the colors I used: Pacific Point and More Mustard.  It’s a vibrant palette, don’t you think?

(Scroll to the bottom of the post for the complete supply list linked to the product picture and description.)

World Treasures stationary kit peacock

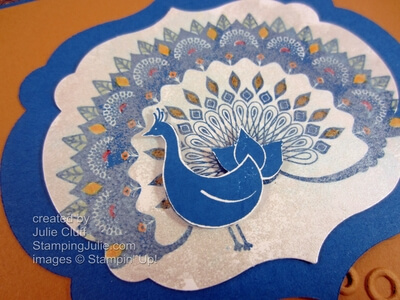
I stamped the peacock from the Stampin’ Up! World Treasures stamp set in Pacific Point and colored in some feathers with my Many Marvelous Markers.  Now here’s the fun part, which is really hard to detect in the photos.  After cropping the peacock out with the Labels Collection Framelit, I covered the stamped and colored label with Shimmer Paint using a sponge daubers.   It gives it such soft, classy sparkle.

I stamped the peacock again, cut out the body and adhered that with Stampin’ Dimensionals.  Then I adhered the peacock lable to a larger label cut from Pacific Point cardstock.  Stampin’ Up!’s coordinating papers and inks makes crafting so satisfying – you always get great results because it matches!

World Treasures stationary kit personalized

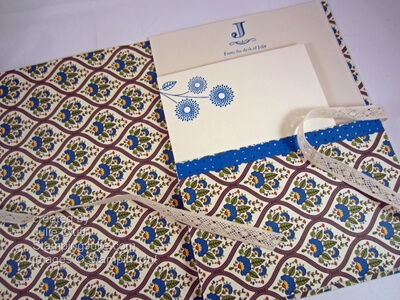
The interior has a pocket for holding stationary and envelopes.  I used the Scallop Border Ribbon Punch to finish off the edge of my pocket.  You’ll notice that I didn’t plan ahead correctly and I cut my paper so that my design is sideways.  Don’t make the same mistake I did – double check your design orientation before you cut!  What’s the saying?  “Measure twice, cut once.”  I should have checked twice and then cut.

World Treasures stationary kit

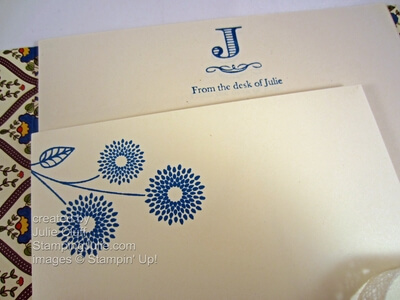
Above is a close up of the stationary.  I used creamy, lightweight paper cut in half  and stamped in Pacific Point with a Monogram Stamp to create the stationary.  The matching envelopes are Very Vanilla envelopes stamped with the flower from the same World Treasures stamp set as the peacock.

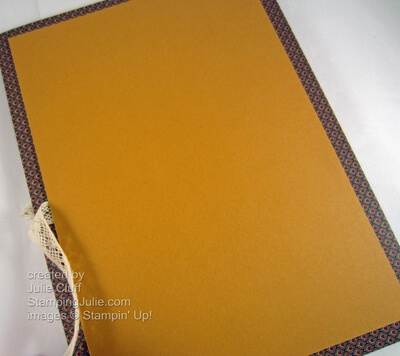
Below is a picture of the back, layered with the matching More Mustard cardstock.  The cardstock layer adds sturdiness and also covers the end of the Victorian Crochet Lace ties.

World Treasures stationary kit back

These stationary sets are great gifts for friends for birthdays or Christmas.  Include a Personalized stamp with the matching stamp pad and it’s a gift they will enjoy for a very long time.

DON’T FORGET TO LEAVE A COMMENTSAY HELLO and let me know what you think.  🙂

Enjoy!  Julie

World Treasures stationary kit close up

Card Recipe:
Stamps: World Treasures w-#126765 c-#126767
Ink: Pacific Point #126951
Paper: International Bazaar Designer Series Paper #126920, More Mustard cardstock #100946, Pacific Point cardstock #111350, Whisper White  cardstock #100730
Extras: Labels Collection Framelits #125598, Elegant Lines Embossing Folder #119277, Big Shot Die-cutting Machine #113439, Victorian Crochet Trim #118481, Frost White Shimmer Paint #116854, Sponge Dauber #102892, Many Marvelous Markers #119806, Dotted Scallop Ribbon Border Punch #119275
 

Bone Appetit Halloween Treat Box

monster munchies treat box
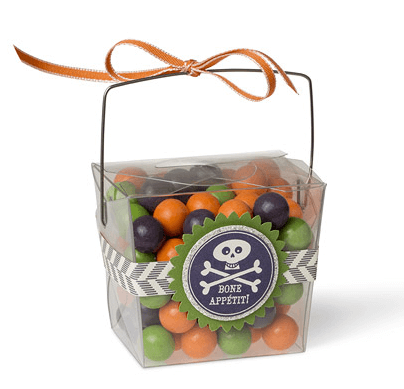
This Bone Appetit treat is a perfect little favor for any get together.  The Stampin’ Up! feature project is made with the Monster Munchies stamp set and the Howlstooth & Scaringbone designer series paper from Holiday catalogClick here for project details.  Your guests will love these little treats!

DO YOU NEED SOME CREATIVE IDEAS TO MAKE YOUR HOLIDAY SEASON EXTRA SPECIAL?  Sign up now for the October Virtual Stamp camp for new, fun Halloween, Thanksgiving and Christmas ideas.  Stamping demonstrators are welcome too!  Offer ends soon.  Click here now for more details and to register.

 Kat R. said: “So cute, and great tutorial! Thanks so much for sharing!”

Order Stampin’ Up! Products Here 24/7

View the Stampin’ Up! Holiday Catalog here

Like us on Facebook

Enjoy!  Julie

Family Sunday: Kristin’s Fun Projects

Kristin My daughter Kristin has always been uber creative.  She and her husband recently moved to Austin, TX and moved into a new apartment.  She has been busy decorating.  But she also goes to garage sales, buys salvagable pieces, remakes them and resells them for a great profit – all in the same day usually!

(She also has a cooking blog!)

Here’s just a couple of her projects.

Garage Sale Find – glider before make over:

Chair Before

Glider after make over.  Can you believe that’s the same chair!?!

Chair after

And here’s a glimpse at just one side of the baby’s cute room:

baby's room

She made the shadow box with burlap, twine and animals from a garage sale that she spray painted pink!

animal shadow box

Last day to order and receive FREE ribbon!

Enjoy!  Julie

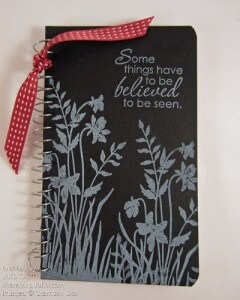
just believe notebook

Stampin’ Up! Just Believe Notepad Tutorial

just believe notebook

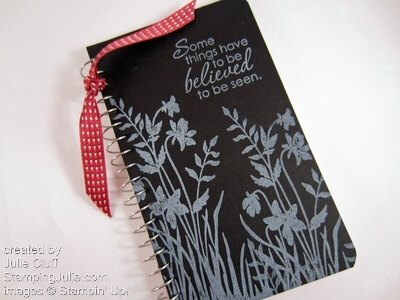
A small, handy decorated notepad can be a perfect gift for a birthday or thank you.  I made similar little pads and attached a little bag of candy kisses as a thank you to some friends who helped me with my daughter’s wedding a couple of years ago.

All you need is a little 3″ X 5″ notepad found in any drug store, Basic Black cardstock, Whisper White Craft stamp pad and a stamp set.  In this example, I used Stampin’ Up! Just Believe stamp set.

Sometimes getting around the spiral binding can seem a little tricky.  So I created this video tutorial to show you how.

Watch the Video: How to Decorate a Spiral Notebook

As you can see it’s super easy to get the chalkboard effect with the black cardstock and the white craft pad.  Also, I like to keep the front of the notebook super clean and simple without a lot of embellishments because I think it’s easier to carry with you for taking quick notes.   But isn’t it just so much more fun to take notes in a sweetly decorated notebook?!  🙂

Be sure to use lots of adhesive to keep your cover intact.  I used SNAIL adhesive in the video, but Multipurpose Liquid Glue would be an excellent choice too.

Don’t Miss Out! Only 4 days left to get your FREE Ribbon!

September 2012 Ribbon Special During the month of September get a FREE spool of ribbon with a $40 product purchase.

Order $40 and choose 1!

Order $200 and get ALL plus $30 FREE in Stampin’ Rewards!

Enjoy!  Julie

just believe notebook details

Notebook Recipe:
Stamps: Just Believe w-#116948 c-#120453
Ink: Whisper White Craft Stamp Pad #101731
Paper: Basic Black Cardstock #121045
Extras: Raspberry Ripple Stitched Satin Ribbon #126845, Paper Piercing Tool #126189, Paper Snips #103579, SNAIL Adhesive #104332 or Multipurpose Liquid Glue #110755