Category: Storage Solutions

Craft & Stamp Storage

Creating is fun AND messy!  Admit it!  We all make a mess when we get busy with our stamps and paper and ink and glitter, etc.  All that stuff everywhere, but it’s manageable if we have a place to put everything away when we’re done.

Recently, while I was stamping with my sister I made a brief video of her craft closet/room.  I think you’ll enjoy this short tour and maybe it will give you some ideas on how to store and organize your own craft and stamping supplies and life will be sweet!

Click here to watch the video! or watch it here: http://youtu.be/Z6syjQdMIfg

Need inspiration to get started on your projects at home?  Buy your supplies through my store and get a free video class and instruction sheets!  Click here for information and registration.  Options for stamping demos too!

I love your feedback.  Please leave a comment and let me know if you are enjoying the blog!

Enjoy!  Julie

Learn From My Mistakes! Episode 2

Here’s another installment in:  “Learn From My Mistakes!”

Summer Silhouettes Stamp Set

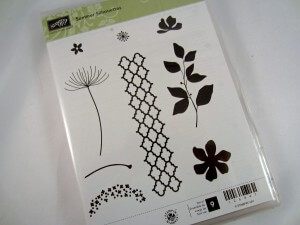
I love my clear stamps – easy to use and fabulous, uniform storage.  If you’ve been here for long you know how much I love this stamp set, Stampin’ Up! Summer Silhouette.  You can see samples hereNotice the number on the front bottom of the case – 9! 

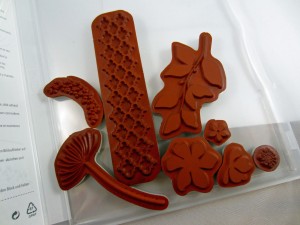
So several days after I had started stamping with this set I was putting it away and I counted my stamps.   A good practice I have had since the beginning of my stamping days. Hmmmm – 8.  I counted again. 8  And again.  8

So I started comparing the cover picture with the stamps and I discovered I was missing………the stem!

Summer Silhouettes Stamps

Apparently, when I popped the rubber out of their sheet and put the stickers on, I totally missed the stem and I guess I….gasp…threw it away!!!  Ugh!!!

I have found a remedy though.  When I’ve needed a stem I’ve turned the long stemmed flower upside down and stamped the end of the stem.

So the moral of the story: ALWAYS check and count your stamps when you assemble them the first time!

Hoping for your Stamping Success!

Enjoy!  Julie

craft room storage and organization

Craft Room Storage & Organization

craft room storage and organization

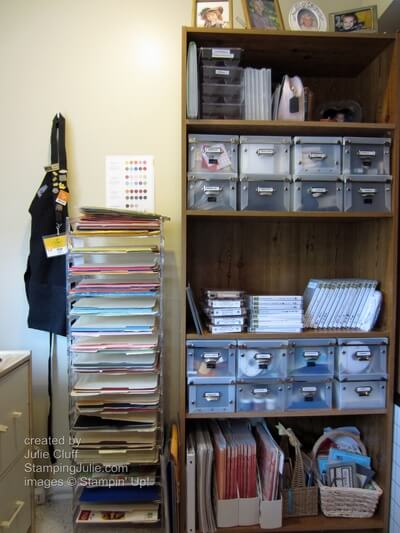
When it comes to craft & stamping room organization, I am ALL about having things at my finger tips.  I don’t want to waste time digging around trying to find what I need or filing through complicated systems getting my supplies out for a project.  Keeping things accessible makes it easier to clean up also.  (The picture above is of the right side of my U-shaped crafting area, the center of which is my desk.)

Everyone has a little different philosophy.  Some people need everything out of sight, but I’m in my happy place if my crafty stuff is visible and organized.  On my Stamping Julie facebook page I’ve been posting specific pictures with storage solutions, so I won’t duplicate that here, but I do want to talk about strategies.
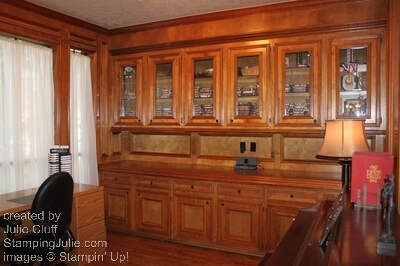
stamping office

Last year I moved from my home in Texas with this great office (see all my stamp sets in the cabinets!) to Kentucky.  We have an office in our KY home also, but my husband is using it for his work, so I’ve taken over a room in the basement with a beautiful view of the rolling hills in our neighborhood!

The challenge was to move from having built-in cabinets to setting up a similar storage solution without them.  I decided I would use what I have, shelves, dressers, etc. and eventually I would install some cabinetry in my new space.

So here’s my organization strategy:

  1. Determine what you use all the time:  ink, paper, stamps, adhesive, etc., and place those things on your desk or right next to you in your primary space.
  2. Determine what you use second most often: favorite embellishments and tools, and place those in your secondary space, close, but not as close as your primary space.  Shelves or drawers or containers nearby.
  3. Determine what you use least, other embellishments, extra supplies and tools.  These item can go in less accessible storage areas.  Top or bottom drawers or shelves.
  4. Determine what you don’t use at all and eliminate it!!!  No, seriously, if you haven’t used it in six months give it or sell it to someone who will use it.  Keep only the stuff you need, use or love!!!
  5. Contain everything!  Everything should have a place and be contained in a box, on a shelf, in a drawer, in a container.
  6. Every few months reassess!  Take a good look at the items in your primary and secondary spaces and determine if they still deserve their place.

For many years, I crafted without a dedicated space.   I kept my supplies in covered tubs and when I was ready to create, I transported the crate from my closet to the dining room table.

I wish I had a picture of my 17 yo son’s room.  I’ve tried to teach him space and organization principles to no avail.  He has a game wheel, that he has had for two years and he has NEVER used, that sits on the floor in his otherwise clean room in a box!  I say, “Get rid of it.  You don’t use it, you don’t need it! And it is taking up prime space!  At the very least put it on the very top shelf of the closet.”  Of course, after my little lesson in organization and space planning, the game wheel has been moved to the top of his closet – NOT!

Visit Stamping Julie on Facebook and let me know about your craft spaces and organization problems and solutions.  Here’s to your success with organizing your craft and stamping space!!

Enjoy, Julie

Recycle and Store Your Paper

Don’t you hate cutting into a new piece of cardstock or pattern paper If you’ve been crafting for very long, you’ve probably discovered how to conserve your paper by cutting near the edges and consolidating your cuts in one area to preserve the largest spaces possible for later.

Do you cringe like I do when I child cuts out a shape right in the middle of the page?  Yikes!!  No one likes to be wasteful, but sometimes you just have to let kids be kids so they can express their creativity.

Have you found the best way to store your paper and scraps?  I have used file folders for years.  It works for me because it allows me to pull the colors I want and transport them quickly and easily to my desk, to a craft night, or to another work surface.  And all my scraps for that color are easily contained.  I’ve seen many other options but nothing I like better.


How do you use your partial sheets or scraps?  Don’t throw away your scraps!  The possibilities are endless.  Sometimes a particular scrap can inspire a whole project design!  Scraps are great for creating card layers, punching shapes and adding gemetric designs to your creations.  And here’s a  tip :  if your scrap is too small to hold onto when you’re using a punch, temporarily adhere a strip of paper to it to use as a handle.

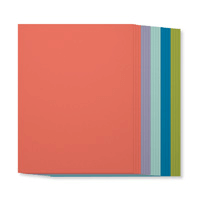
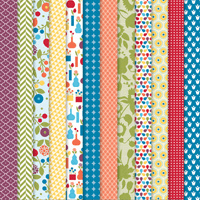
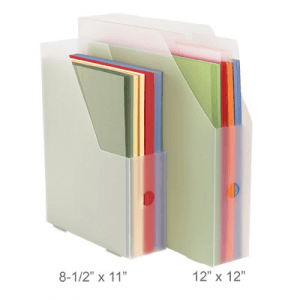
How do you store your pattern paper?  I cut a slit across the top of my designer series paper packages and store my paper and paper scraps in their packages.  I love that the designs in a package go together so well and I want to keep them together.  Then I place them in paper holders divided by color group: subtle, brights, regal, and neutral.  For example, Summer Smooches Designer Series Paper shown above would go under brights.

  Have a particular storage issue?  I can help you explore ideas.  Call or write me today.  I hope this has helped you consider the best ways to conserve and store your paper for better crafting and more creativity!